sides

There is something about grapes and feta that I find extremely appealing. Each has a very distinct texture and consistency that, when combined, beautifully accentuates the other. Grape and feta pasta salad happily integrates crisp grapes and salty feta while allowing each to maintain its individual brilliance. Crunchy pine nuts and fresh herbs complete this flavor profile, which envelops chewy bits of penne for a deeply satisfying snack or meal.

This recipe for 
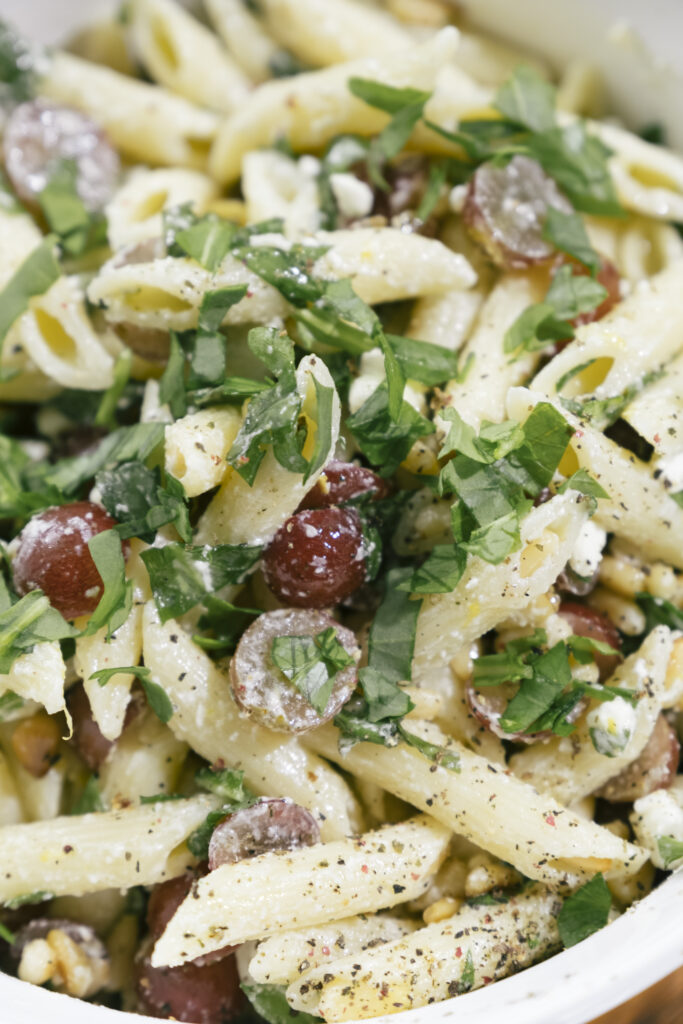
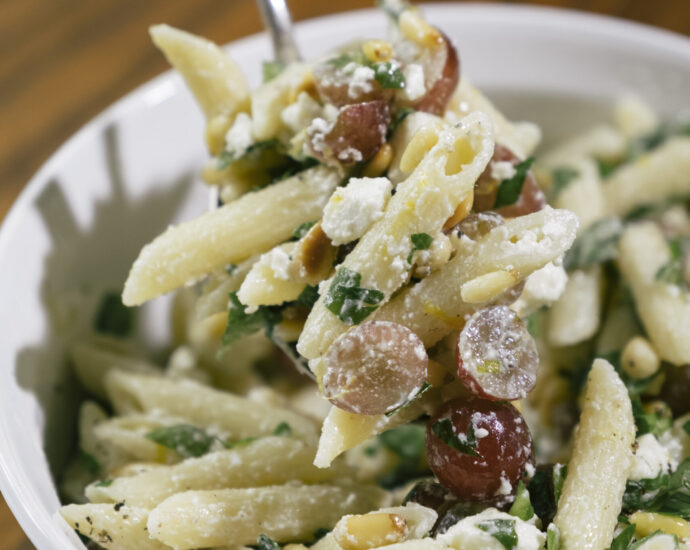
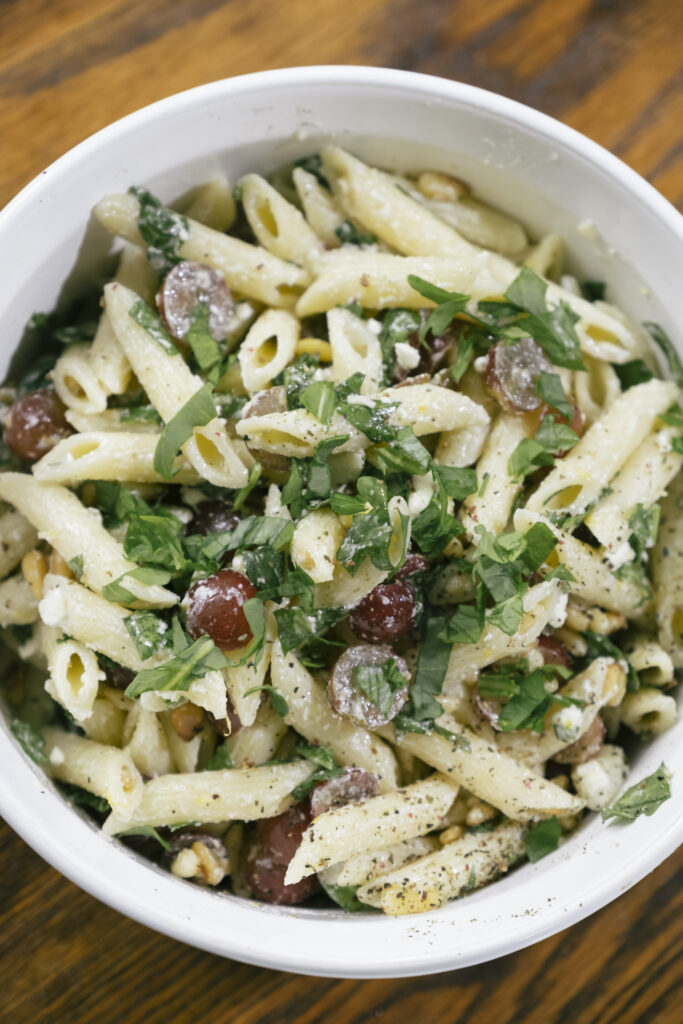
grape and feta pasta salad can easily be doubled for a larger group and made in advance to allow the flavors to co-mingle and deeply marinate. I use penne, but free to mix it up with different pasta shapes!

Serves 6

ingredients

  • 3 tablespoons salt, divided
  • 1 pound penne rigate
  • 2 tablespoons aioli
  • 1 tablespoon olive oil
  • ¼ cup pine nuts, toasted
  • 2 cups grapes, halved
  • ½ cup basil, chopped
  • ½ cup parsley, chopped
  • 6 ounces feta, crumbled
  • 1 tablespoon freshly cracked black pepper

steps

Bring a large pot of water with 2 tablespoons of the salt to a boil. Cook the pasta until al dente, about 8 minutes, then strain the pasta and rinse it in cold water to cool it and wash off excess starch. This will prevent the pasta from sticking together. Transfer the pasta to a bowl and toss it with the aioli and olive oil. Season with the remaining 2 tablespoons of salt and the black pepper. Add in the toasted pine nuts and toss to combine, then gently fold in the grapes. Add the basil and parsley until evenly distributed. Lastly, toss in the crumbled feta.

A dutch baby, also known as a German pancake, is a crowd pleaser in every way. It captivates children and adults alike when it puffs up in the oven into a fluffy, hearty delight, similar to a popover or Yorkshire pudding. So, not only is a dutch baby incredibly satisfying and delicious to make, it is also entertaining. On top of that, it is simple and can be used as a base for any number of toppings including, meat, cheese, vegetables, or fruit, and consumed any time of day!

This ham and cheese dutch baby with maple dijon drizzle is kind of like an open-faced sandwich meets omelette. It is sweet and salty and savory with herby bits throughout. A ham and cheese dutch baby is an excellent meal or snack, all day long.

NOTE: It is very important not to open the oven while the dutch baby cooks, to prevent it from deflating prematurely, something that tests my patience, but that I promise is rewarding! 

serves 2

ingredients

  • 3 eggs
  • ½ cup milk
  • Pinch of salt
  • 1 teaspoon chopped chives
  • 1 teaspoon chopped parsley
  • 1 teaspoon dried herbs de Provence
  • 1 teaspoon freshly grated nutmeg
  • 1 teaspoon lemon zest (optional)
  • ½ cup flour
  • 4 tablespoons butter or refined coconut oil (I use a mix of the two) 
  • 6-8 ounces ham, bacon, or rendered pancetta
  • 8 ounces swiss or gruyere cheese, shredded
  • 2 tablespoons chopped parsley, to garnish
  • 2 tablespoons dijon mustard
  • 2 tablespoons pure maple syrup

steps

Preheat the oven to 425°F. Place a cast iron skillet in the oven and allow it to heat.

In a large bowl, beat the eggs until they are light and fluffy. Add the milk and continue to beat. Add the salt, chives, parsley, herbs de Provence, nutmeg, lemon zest if using, and mix. Beat in the flour until it is evenly combined and the batter has been thoroughly blended. Let sit for 15-20 minutes.

Remove the skillet from the oven and add butter or coconut oil. Swirl it around until it melts then pour in the batter.

Bake it in the oven for 17-20 minutes until it begins to puff up and become golden.

Add the mustard and maple to a small bowl and evenly mix.

Remove dutch baby from oven and layer on ham and cheese. Return to oven and cook for another 4 minutes or until cheese has melted. Drizzle with maple dijon and parsley.

I almost always have carrots around. They are tasty and inexpensive and super versatile. In high school, I used to eat them at swim meets for a boost of natural sugar. Now I’ll have them raw with smoked salt or roasted with tahini, quick-pickled, in my dad’s carrot slaw, or as a stew or soup base in a mirepoix. And then, of course, there’s carrot cake. Here, I present maple candied carrot confit.

I love making carrot confit because it’s so straightforward and very low-maintenance. Just throw your pan in the oven, let the carrots cook slowly, and be amazed at their candy metamorphosis into maple candied carrot confit. Don’t forget to mix them every now and then!

Serves 2-4

ingredients

  • 2 pounds of carrots, grated and diagonally sliced
  • 4 tablespoons butter
  • 4 tablespoons real maple syrup
  • 1 teaspoon kosher salt
  • ½ teaspoon pepper
  • ½ teaspoon garlic powder
  • ½ teaspoon smoked paprika
  • 1 teaspoon orange zest

steps

Preheat the oven to 275°F. Melt the butter in a small saucepan. Add the maple syrup and stir until combined.

Place the carrots in pan and sprinkle salt, pepper, garlic powder, smoked paprika and orange zest over the top. Evenly pour the maple butter over the top of the carrots and mix using a rubber spatula. Shake the pan so that the carrots evenly cover the bottom of it.

Bake for 3 hours until the carrots are soft.

Today we composted the outdoor gardens in preparation for the cold months ahead. Our community composts regularly and it is always incredible to see how food scraps and everyday waste are turned into nutrients for nature. Preparing for winter left me yearning for one of my favorite cozy dishes – cheesy stuffed artichokes.

I grew up eating this veggie, and though their season is at its peak in March, artichokes are basically available year-round these days. Cheesy stuffed artichokes became a family favorite of mine, as they always seemed so special whenever my parents served it. The recipe is, in fact, pretty simple.

I prepared this recipe for two, with a date in mind, but it can easily be doubled or tripled depending on the number of people you want to feed. Serve these cheesy stuffed artichokes as a side to a simple lemon pasta or as the main event with a glass of wine!

Note: If you only have plain breadcrumbs, you can season them at home with salt, pepper, garlic powder, onion powder, dried oregano, dried parsley, and crushed red pepper!

Serves 2

ingredients

  • 4 artichokes (I prefer artichokes with larger leaves as there is more room to stuff!)
  • 1 lemon, sliced
  • 4 teaspoons olive oil
  • 1 cup seasoned breadcrumbs
  • 1 cup shredded mozzarella

steps

Turn the oven broiler on. Wash the artichokes, cut their stems to make flat bottoms, and snip the tops of artichoke leaves (they can be very sharp!)  Pull back the leaves to loosen them.

Bring a pot of water to a boil. Place a steamer basket or a colander inside. Lay slices of lemon directly on the steamer basket or colander and place artichokes directly on the lemon slices. Cover with a lid and steam for 20 minutes.

Remove the artichokes from the pot and let cool for 5 minutes or until they are cool enough to the touch without burning your fingers!

Place the steamed lemon slices beneath the artichokes on a pan lined with parchment paper. Separate the artichoke leaves and drizzle olive oil inside. Fill the leaves with seasoned breadcrumbs first, then tuck mozzarella inside the leaves. Be sure to evenly distribute the breadcrumbs and mozzarella among every leaf to ensure every bite is tasty!

Place in the broiler for 7-10 minutes until cheese is bubbly and browning and leaves are crisp.

Use a scissor to trim the sharp leaves
Spread apart the leaves to fill with delicious breadcrumbs and cheese
When eating, work your way in from the outer leaves