cheese

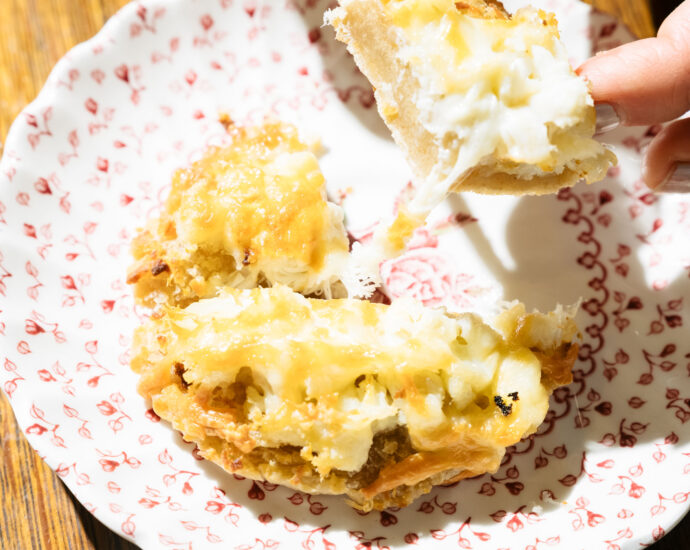
Crabbies are a tasty creation which, throughout my childhood, my family always served on special occasions or holidays, particularly during the winter months. They are sort of like a deconstructed crab dip, spread on a tangy english muffin and toasted to perfection. Crabbies are classic, cozy, and old-fashioned.

As a child, I remember visiting a B&B in Spring Lake, NJ, sitting down with the proprietors in front of a crackling fire, and being served crabbies. They also served classic popcorn tins which are, in my opinion, one of the most festive winter delights.

My aunt traditionally made crabbies using a soft cheese spread, but my recipe uses cream cheese infused with crushed red pepper to add creaminess and spice.

Serve these delights for a romantic date or as a delectable party snack. I promise, crabbies will never disappoint!

Ingredients

  • 8 ounces / 2 cups shredded sharp cheddar cheese, divided
  • 4 ounces cream cheese, softened to room temperature
  • 1 teaspoon crushed red pepper
  • 10 english muffins, split with a fork
  • ½ pound lump crab meat

steps

Using a food processor or electric mixer, blend the cream cheese and 1 cup of the shredded cheddar cheese. Add crushed red pepper. Pulse until the mixture becomes a spreadable paste, much like typical cream cheese but now infused with cheddar. Set aside.

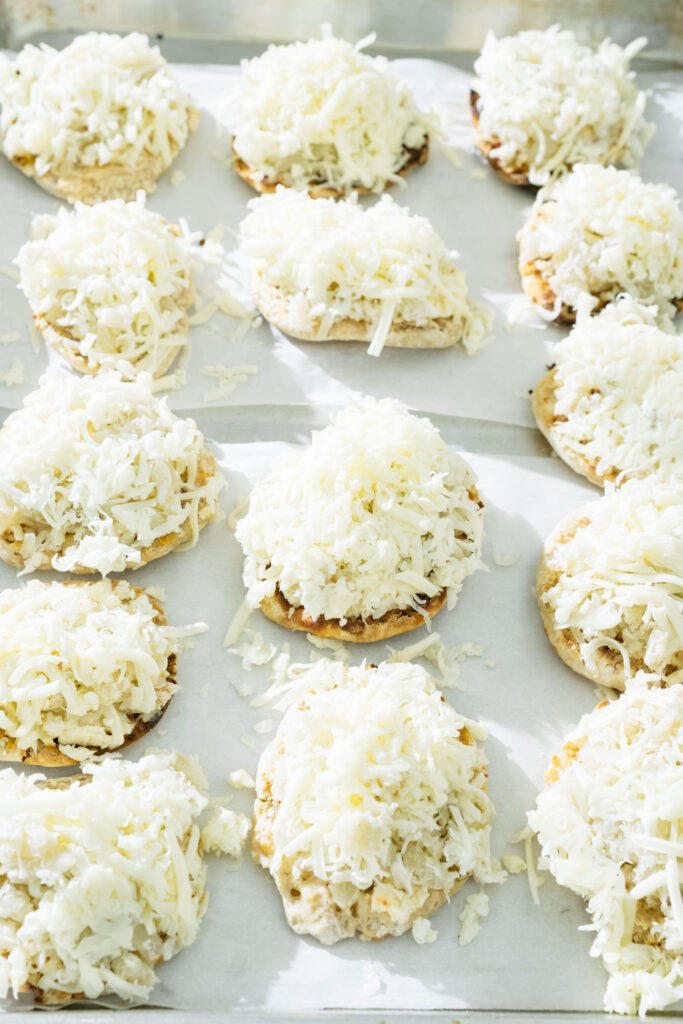
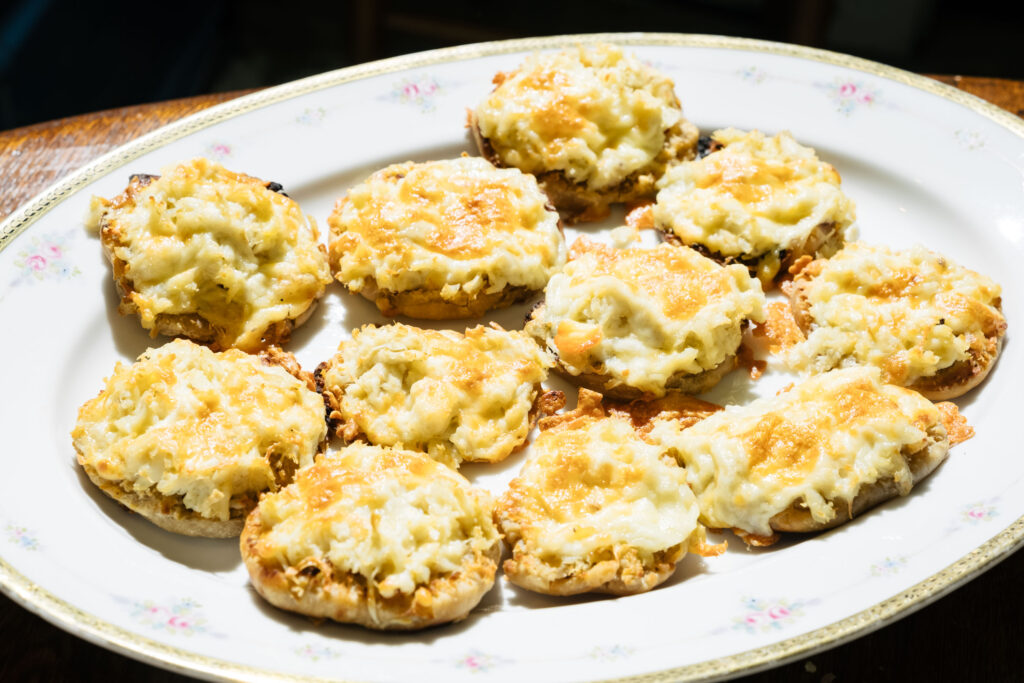
Toast english muffin halves in batches of 2-4 depending on the side of your toaster (if you do not have a toaster, toast them on the rack in the oven at 350°F) and spread with cheese mixture. Top with crab meat and shredded cheddar cheese.

Place all 20 prepared crabbies on a sheet pan and put in freezer. Freeze for at least 1 hour. These will last in the freezer for up to two weeks, so feel free to do this ahead of time.

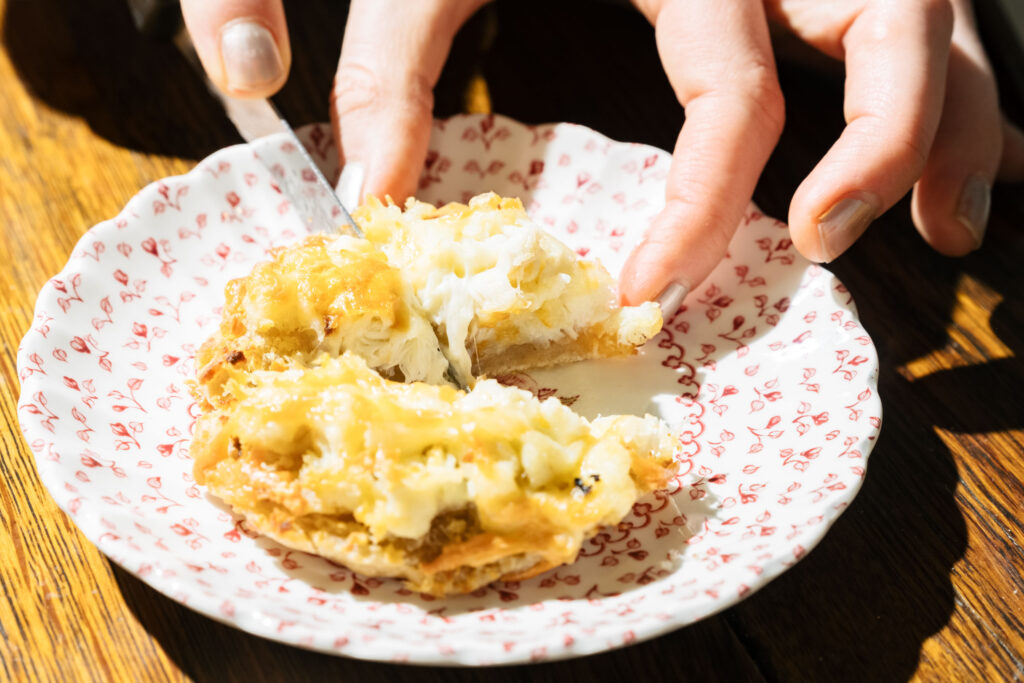
When ready to cook, preheat oven to 300°F. bake for 20 minutes. Turn on oven broiler and broil for 6 minutes, rotating the pan 180° every 2 minutes so ensure each crabbie is evenly browned. Serve whole or cut in quarters.

Today we composted the outdoor gardens in preparation for the cold months ahead. Our community composts regularly and it is always incredible to see how food scraps and everyday waste are turned into nutrients for nature. Preparing for winter left me yearning for one of my favorite cozy dishes – cheesy stuffed artichokes.

I grew up eating this veggie, and though their season is at its peak in March, artichokes are basically available year-round these days. Cheesy stuffed artichokes became a family favorite of mine, as they always seemed so special whenever my parents served it. The recipe is, in fact, pretty simple.

I prepared this recipe for two, with a date in mind, but it can easily be doubled or tripled depending on the number of people you want to feed. Serve these cheesy stuffed artichokes as a side to a simple lemon pasta or as the main event with a glass of wine!

Note: If you only have plain breadcrumbs, you can season them at home with salt, pepper, garlic powder, onion powder, dried oregano, dried parsley, and crushed red pepper!

Serves 2

ingredients

  • 4 artichokes (I prefer artichokes with larger leaves as there is more room to stuff!)
  • 1 lemon, sliced
  • 4 teaspoons olive oil
  • 1 cup seasoned breadcrumbs
  • 1 cup shredded mozzarella

steps

Turn the oven broiler on. Wash the artichokes, cut their stems to make flat bottoms, and snip the tops of artichoke leaves (they can be very sharp!)  Pull back the leaves to loosen them.

Bring a pot of water to a boil. Place a steamer basket or a colander inside. Lay slices of lemon directly on the steamer basket or colander and place artichokes directly on the lemon slices. Cover with a lid and steam for 20 minutes.

Remove the artichokes from the pot and let cool for 5 minutes or until they are cool enough to the touch without burning your fingers!

Place the steamed lemon slices beneath the artichokes on a pan lined with parchment paper. Separate the artichoke leaves and drizzle olive oil inside. Fill the leaves with seasoned breadcrumbs first, then tuck mozzarella inside the leaves. Be sure to evenly distribute the breadcrumbs and mozzarella among every leaf to ensure every bite is tasty!

Place in the broiler for 7-10 minutes until cheese is bubbly and browning and leaves are crisp.

Use a scissor to trim the sharp leaves
Spread apart the leaves to fill with delicious breadcrumbs and cheese
When eating, work your way in from the outer leaves