
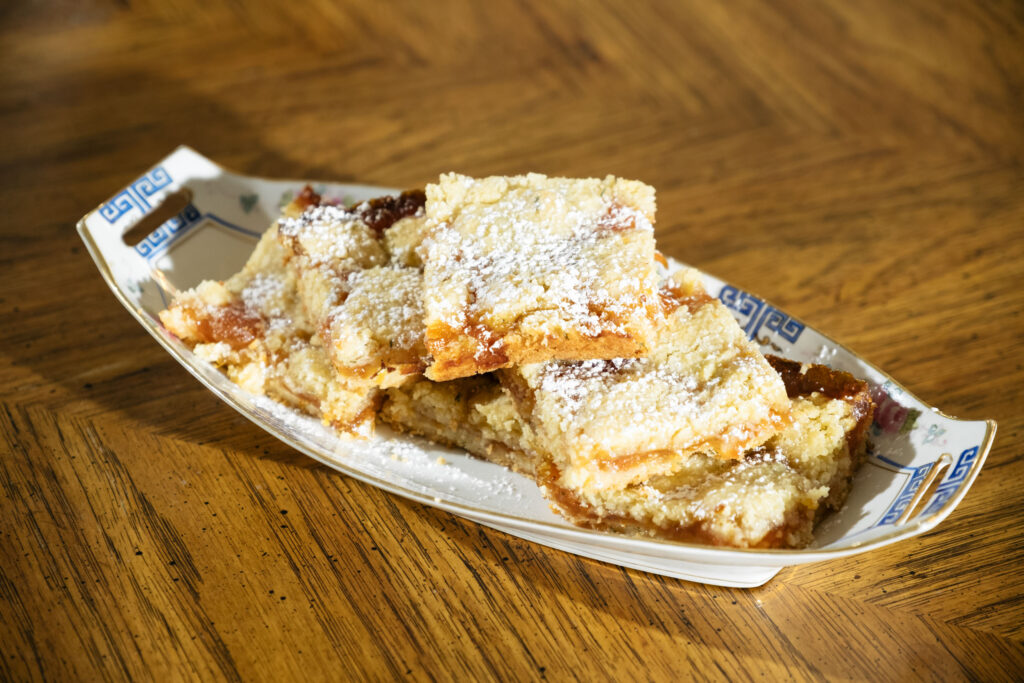
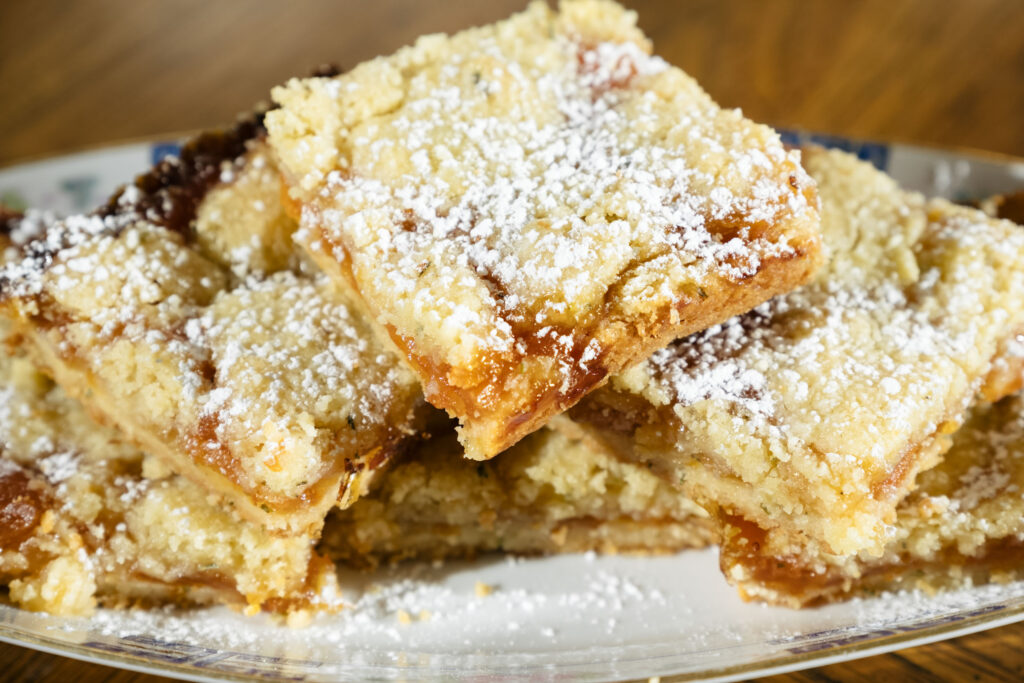
grapefruit herb shortbread bars
Whenever I make marmalade, it always seems to multiply. I will have jars hanging around the kitchen, waiting to meet their destiny. Such is the case with a batch of grapefruit marmalade I made a few months ago. When properly sealed in a mason jar and unopened, it can last six months stored in a cool, dry place and even longer in the refrigerator. Grapefruit herb shortbread bars are the perfect solution to a plethora of marmalade !
I love the combination of rosemary and grapefruit, so I sought to incorporate those flavors into a dessert. Thus, grapefruit herb shortbread bars were born. The aromatic and fragrant rosemary blends harmoniously with the bitterness of the citrus, and basil and sugar round out the palate in this recipe.
ingredients
- 1 cup (2 sticks) butter
- 1 ¼ cups sugar, divided
- 2 cups flour
- Pinch of salt
- 1 tablespoon fresh rosemary, chopped
- 1 teaspoon fresh basil, chopped
- 1 ½ cups (12 ounces) grapefruit marmalade
- Confectioners sugar
steps
Preheat the oven to 350°F and line a 9×9 inch baking pan with parchment paper.
In a stand mixer or food processor, cream the butter and 1 cup of the sugar together until it is light and fluffy. In a separate bowl, mix together the flour, salt, rosemary, and basil. Slowly add the flour mixture to the butter mixture until combined.
Split the dough in half and press one half of it into the bottom of the parchment-lined pan. Evenly distribute the marmalade over the top of the dough. Sprinkle the remaining ¼ cup of sugar over the marmalade and drop small balls of the remaining dough over the top. The balls should resemble a crumb topping and will spread out more evenly when the bars bake.
Bake for 45 minutes until the shortbread begins to turn golden and the marmalade is bubbly. Let cool and dust with confectioners sugar.
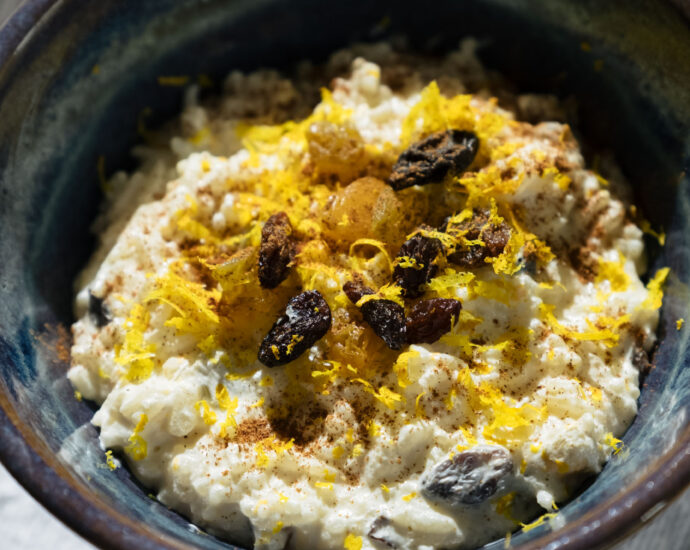
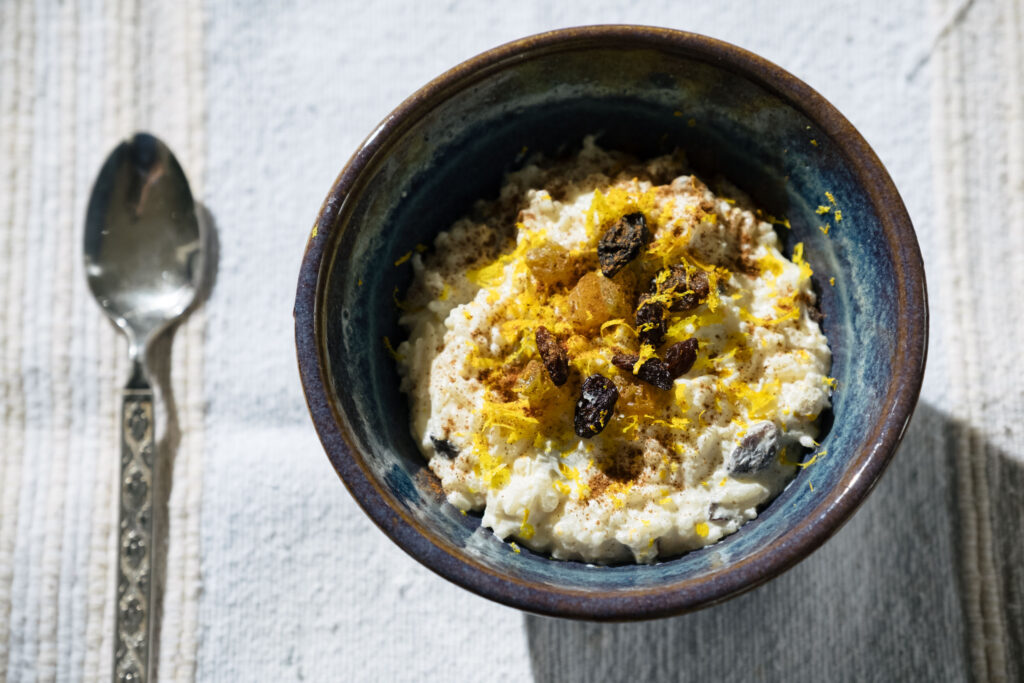
orange rice pudding with rum soaked raisins
Rice pudding is one of those timeless desserts that has been enjoyed by generations alike. This is true for my family and I know it is true for others. My Grandma was said to have made the best rice pudding around, and it is something that both of my parents have loved and served over the years. Here is a recipe for orange rice pudding with rum soaked raisins !
The best thing about this orange rice pudding is that it is insanely easy to make and instantly gratifying. You can prep it, cook it, and indulge in the melange of flavors in less than an hour. Soaking the raisins in rum adds a soft and chewy texture to the rich and creamy dish.
ingredients
- 1 cup uncooked short-grain or long-grain white rice
- 4 cups milk
- ½ cup granulated sugar, plus more as needed
- 1/4 teaspoon kosher salt
- 1 tablespoon orange zest
- 1 ½ teaspoons almond extract, divided
- 1 teaspoon vanilla extract
- ½ cup raisins
- ½ cup golden raisins
- 3 tablespoons rum
- Cinnamon
steps
Add raisins and rum to a bowl and splash in ¼ teaspoon of the almond extract.
Place the uncooked rice, milk, sugar, salt, and orange zest in a medium-large pot. Cover and bring to a boil then reduce to a simmer. Cook until the mixture begins to thicken, about 30 minutes.
Add the rum and raisins to the pudding along with the vanilla extract and remaining almond extract. Mix and cook uncovered for another 4 minutes. Swirl in 1 tablespoon of butter until it melts. Dust with cinnamon and serve heated, chilled, or at room temperature.

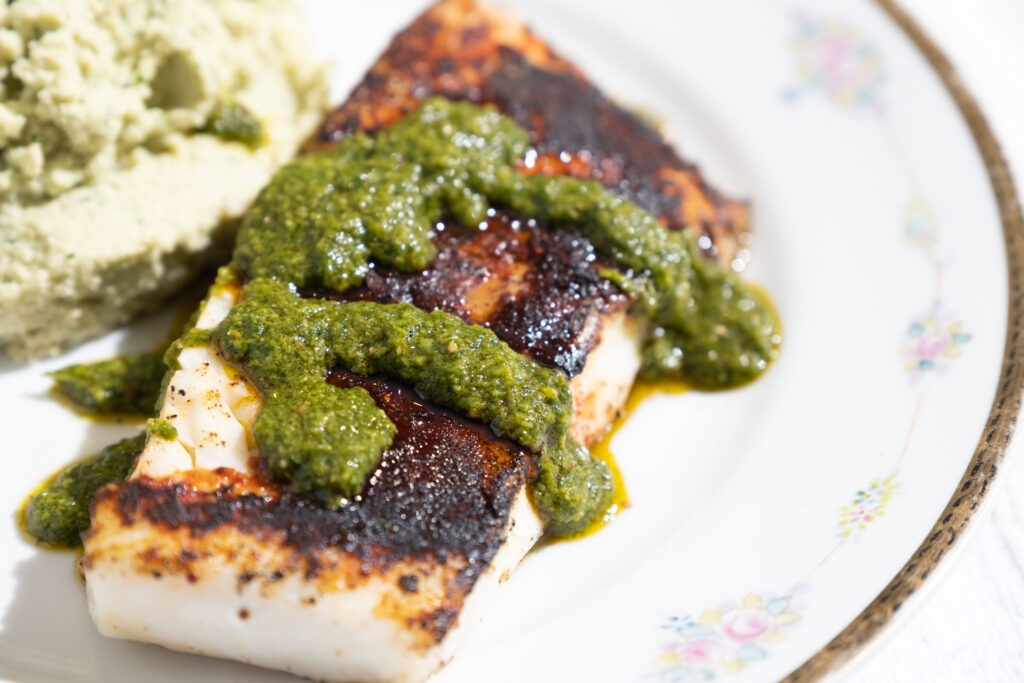
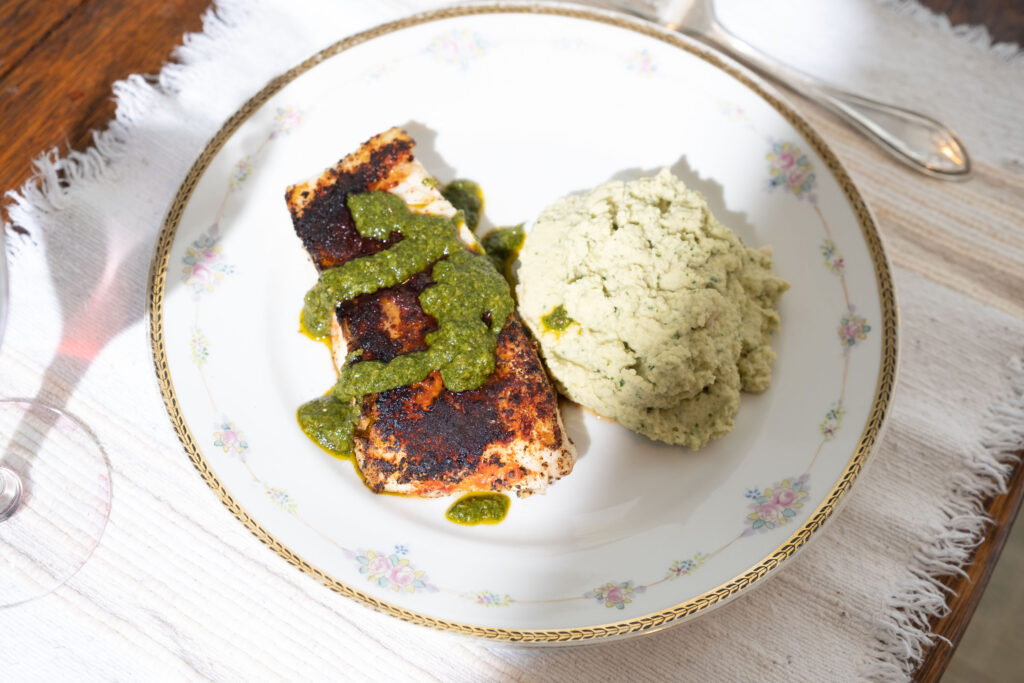
seared cod with tahini cauliflower purée and chermoula
Growing up, we ate cod weekly. It was generously spiced and flaky and delicious. Nowadays, I turn to cod as a healthy base for a delicious meal any night of the week. It’s nearly foolproof to prepare and pairs well with really any flavor combination. I am partial to cooking it with pepper and smoked paprika, probably because I grew up eating it that way. Cumin adds a nice depth to the spices which, when seared, become crisp and aromatic. Paired with tahini cauliflower and chermoula, this seared cod is a winner.
Chermoula is a bright fragrant sauce hailing from North Africa which is generally made of garlic, fresh herbs, lemon, and spices. Though it is traditionally paired with fish, I could pretty much eat it on anything.
Cauliflower, as some may know, has been having a moment for a while now. We have seen it served as a substitute or used as the main event in all sorts of dishes. I remember having smashed cauliflower for the first time at a restaurant in Naples, FL back in 2003 during the height of the Atkins Craze. I personally love simple roasted cauliflower with tahini, so this pureed tahini cauliflower and chermoula is a way to access those flavors with a totally different texture.
Serves 2
ingredients
for the fish and cauliflower puree
- 12-16 ounces of cod
- 1 teaspoon smoked paprika
- 1 teaspoon cumin
- 2 teaspoons freshly ground black pepper, divided
- 2 teaspoons kosher salt, divided
- 2 tablespoons olive oil, divided
- 1 shallot, sliced
- 1 clove of garlic, sliced
- 3 cups cauliflower florets, fresh or frozen
- ¼ cups fresh parsley, leaves and stems
- 2 tablespoons tahini
for the chermoula
- 1 teaspoon coriander seeds
- 1 teaspoon cumin seeds
- 3 garlic cloves
- ¾ cup extra-virgin olive oil
- 1 teaspoon finely grated lemon zest
- ¼ cup fresh lemon juice
- 1 teaspoon smoked paprika
- 1 teaspoon kosher salt
- ½ teaspoon crushed red pepper
- 1 cup parsley leaves and stems, packed
- 1 cup cilantro leaves and stems, packed
- ⅓ cup mint leaves
fish and cauliflower steps
Place the fish skin-side up and gently pat on the paprika, cumin, 1 teaspoon of black pepper, and 1 teaspoon kosher salt to evenly coat the entire side. Let sit for 5 minutes.
Meanwhile, heat 1 tablespoon olive oil in a skillet and add the shallot. Cook for 2 minutes then add the garlic. Add the cauliflower and cook, flipping the florets until they begin to turn golden and brown.
Heat a skillet over high and add the fish, spiced skin side down. Cook for 5-6 minutes then flip. A sign that the fish is done cooking on the first side is when it releases easily and does not stick to the pan. Cook for another 4 minutes on the other side. The fish is done when it begins to flake apart.
Add cauliflower, tahini, and ¼ cup fresh parsley to a food processor and blend until smooth. The consistency will be like that of hummus with specks of parsley evenly throughout. Serve with a generous spoonful (or two!) of chermoula.
chermoula steps
Place the coriander and cumin seeds in a saucepan and toast for 7-10 minutes until nutty and fragrant. Crush or add to a spice grinder. Add the toasted seeds, garlic cloves, olive oil, lemon zest, lemon juice, smoked paprika, kosher salt, and crushed red pepper to a food processor or blender. Blend for a few minutes until evenly combined. Add the parsley, cilantro, and mint and process until smooth. Chermoula will last for 3-4 days in the refrigerator.
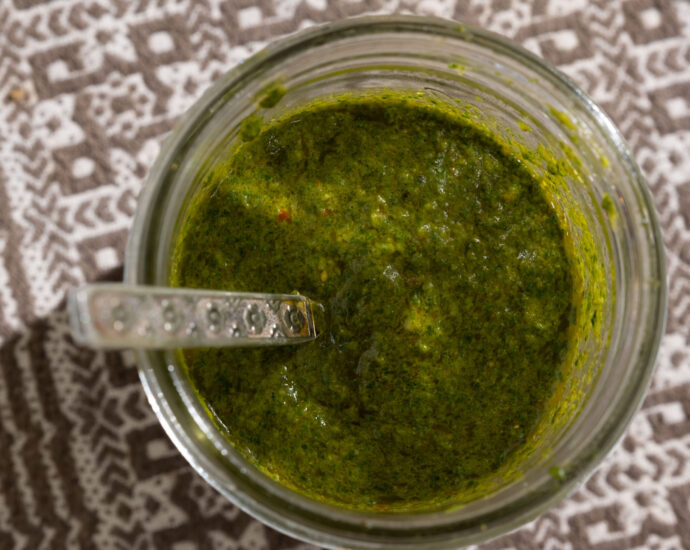
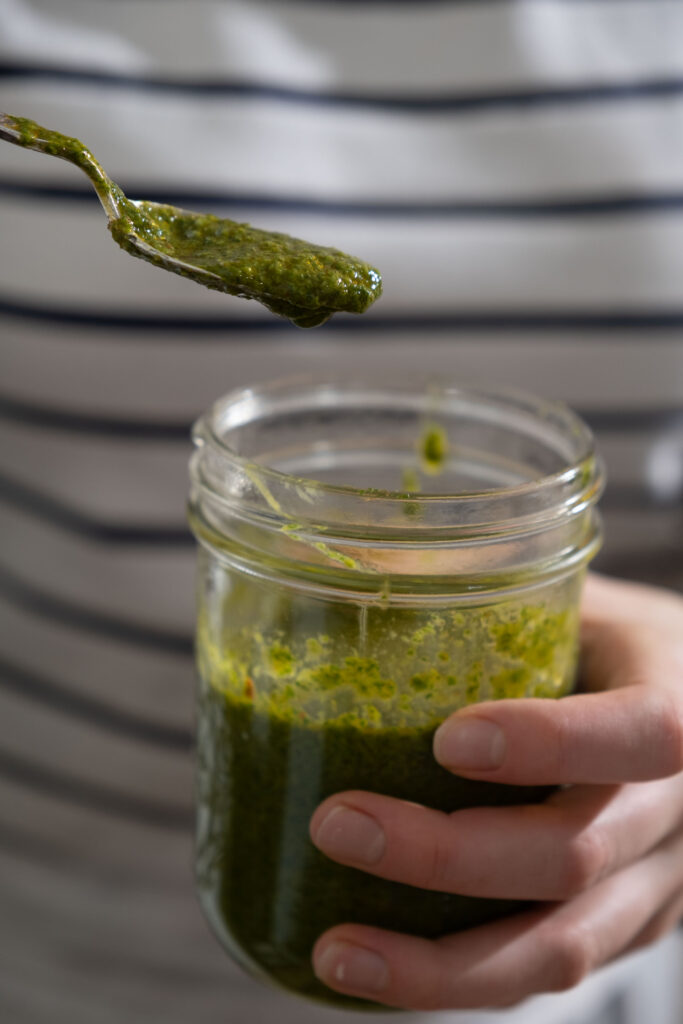
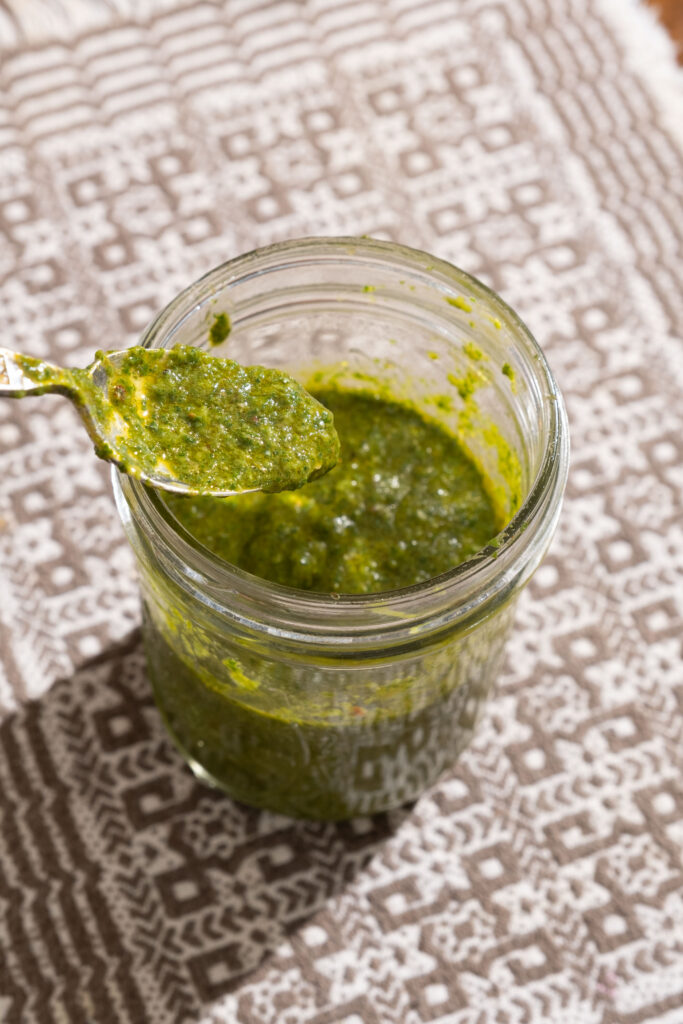
chermoula
Chermoula is a bright + fragrant sauce from North Africa which is typically made of garlic, fresh herbs (parsley, cilantro, mint), lemon, and spices. These fresh, verdant ingredients emulsify with olive oil into the smooth and luxurious sauce. Though chermoula is traditionally paired with fish, I could pretty much eat it on anything. Add chermoula to any meal to zest up the dish and pack in flavor.
ingredients
- 1 teaspoon coriander seeds
- 1 teaspoon cumin seeds
- 3 garlic cloves
- ¾ cup extra-virgin olive oil
- 1 teaspoon finely grated lemon zest
- ¼ cup fresh lemon juice
- 1 teaspoon smoked paprika
- 1 teaspoon kosher salt
- ½ teaspoon crushed red pepper
- 1 cup parsley leaves and stems, packed
- 1 cup cilantro leaves and stems, packed
- ⅓ cup mint leaves
steps
Place the coriander and cumin seeds in a saucepan and toast for 7-10 minutes until nutty and fragrant. Crush or add to a spice grinder. Add the toasted seeds, garlic cloves, olive oil, lemon zest, lemon juice, smoked paprika, kosher salt, and crushed red pepper to a food processor or blender. Blend for a few minutes until evenly combined. Add the parsley, cilantro, and mint and process until smooth. Chermoula will last for 3-4 days in the refrigerator.
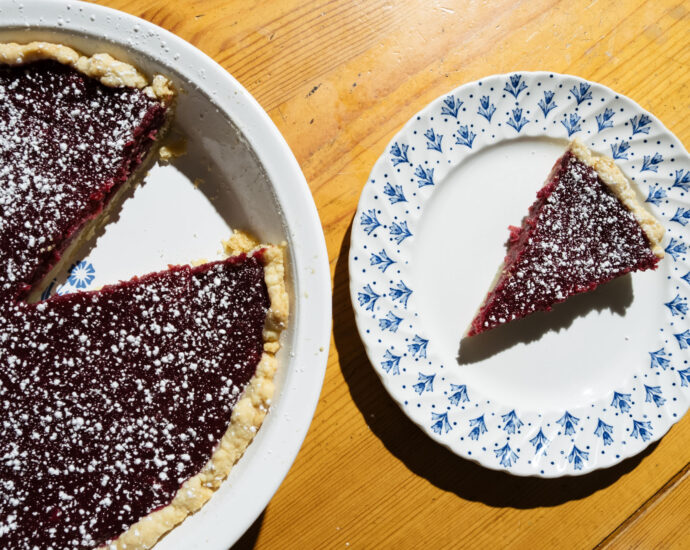
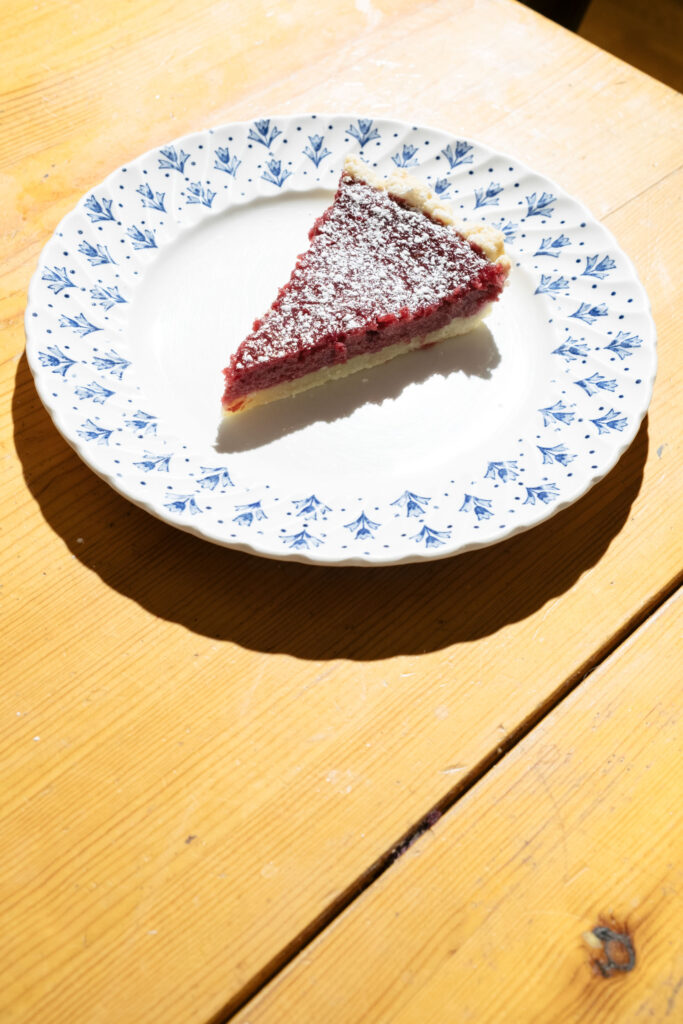
lemon raspberry curd pie
Back in the summer, I became obsessed with picking wild raspberries from the various brambles that grow around our house and nearby. Wild raspberries are a bit of a prickly plant, so it was quite a production to pick a high volume of berries every day. Nonetheless, I persisted for my love of raspberries and for sharing the delicious creations that I made from them. I picked gallons of berries a day and made jars of jam and pints of sorbet. And, I froze a great deal.
Months later, it is now the dead of winter and the grey day doldrums are really kicking in. Though I love winter and its coziness, I do require the occasional reminder of brightness. Enter: my frozen raspberries from months past which I transformed into lemon raspberry curd.
This lemon raspberry curd pie is rewarding in so many ways. It is like a giant lemon bar meets raspberry pie and can be made into one giant pie, individual mini tarts, or cut into bars. The filling is quite rewarding to make and the natural color provides a beautiful taste of summer!
ingredients
for the crust
- ½ cup (1 stick) butter, cut into ½ inch cubes (cut in half then in half again)
- 1 cup all-purpose flour
- 1 teaspoon sugar
- ¼ teaspoon kosher salt
- 3 tablespoons ice water
- 1 teaspoon apple cider vinegar
for the filling
- 2 cups raspberries
- 1 cup sugar
- ¼ cup lemon juice
- ¼ cup lemon zest
- 4 eggs
- ½ cup (1 stick) butter
- Powdered sugar
crust steps
Place the flour, sugar, and salt in a large bowl and mix to combine. Combine the water and the apple cider vinegar and set aside.
Sprinkle the cubes of butter into the flour mixture and give it a toss. Use your fingers or a dough blender to press and pinch the flour into the pieces of butter until combined. The dough will be shaggy and there will be different sized pieces of butter. Slowly drizzle in the water vinegar mixture and continue to press and pinch the dough until it forms a ball. Wrap in plastic wrap and refrigerate for 1-2 hours.
filling steps
Add the raspberries to a medium or large pot and cook over medium-high, mashing continuously, until the berries begin to break down and release their juices, about 7-10 minutes. Transfer to a blender or food processor and puree until smooth. Strain in a mesh sieve and return the strained juice to the pan.
In a medium-sized bowl, combine the sugar, lemon juice and lemon zest. Add the eggs and mix thoroughly. Pour the entire mixture into the pan with the raspberries. Cook on medium-low for about 5 minutes until all of the ingredients are combined. Add the butter and stir constantly until it melts. Continue cooking for another 10-12 minutes until the mixture thickens.
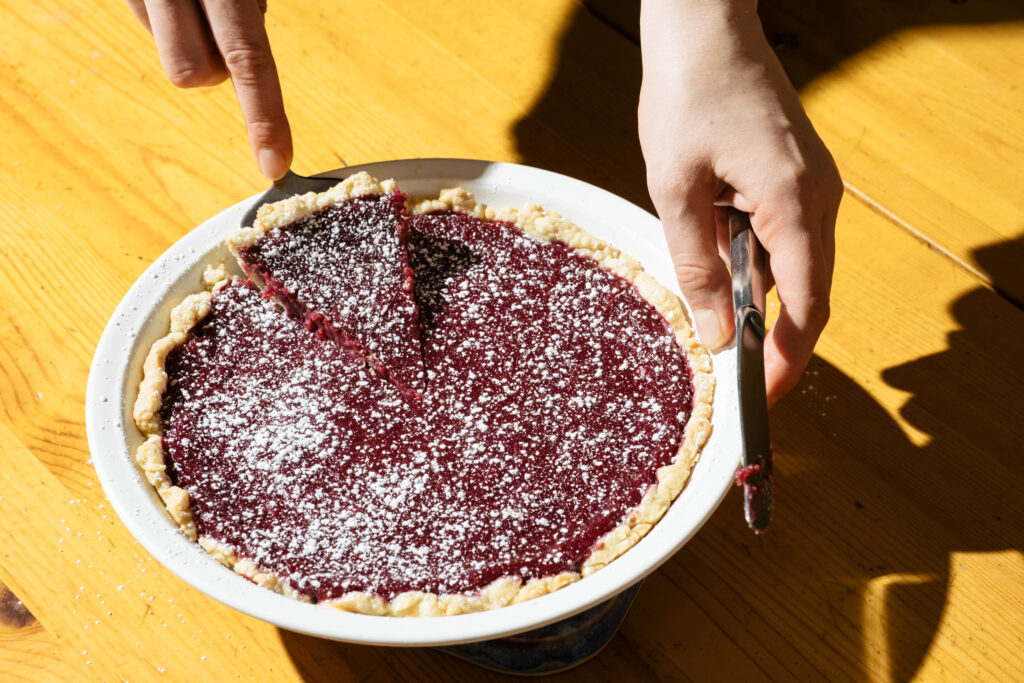
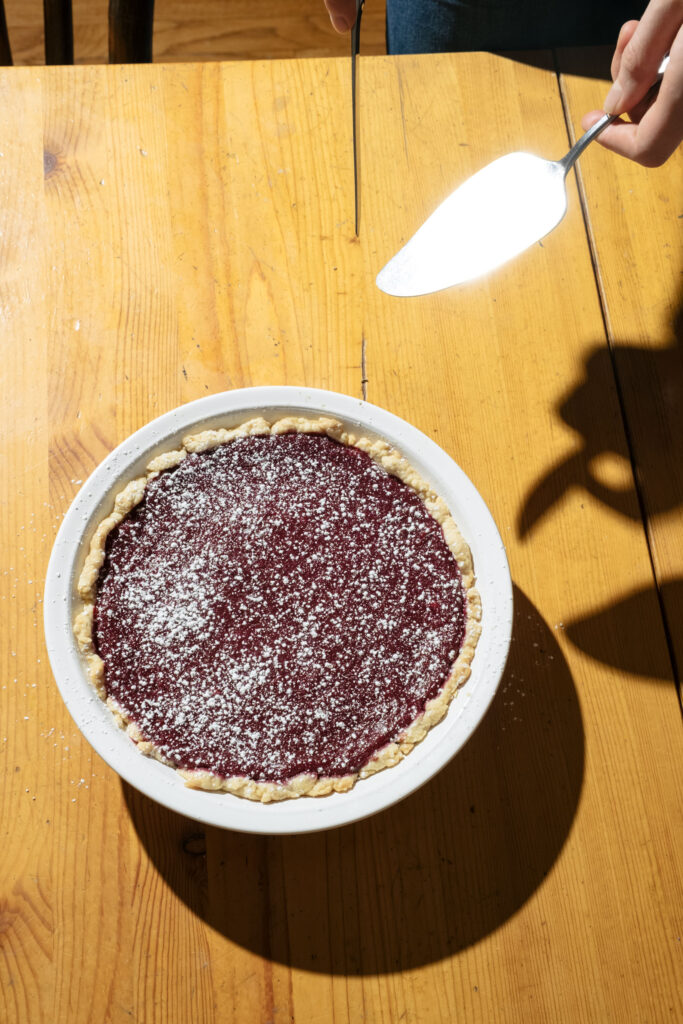
assembly steps
Preheat the oven to 350°F. Roll out the crust and press it into a 9-inch pie dish. Bake the crust for 10 minutes. Remove from the oven and add the filling. Bake for another 35-40 minutes. Let cool and sprinkle with powdered sugar.
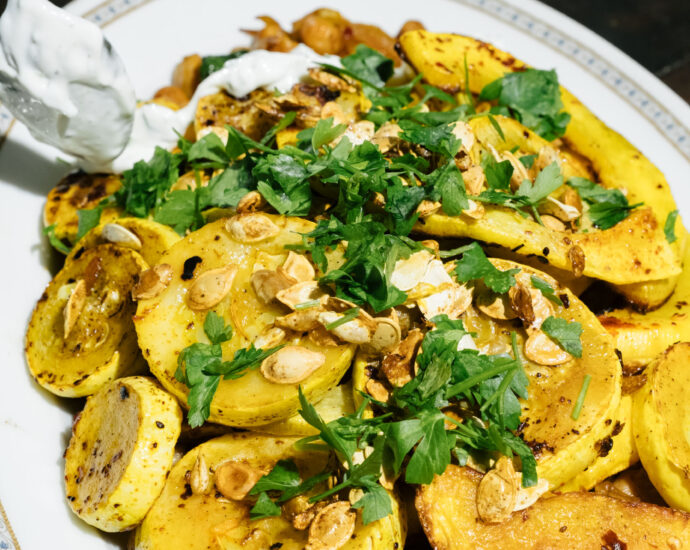
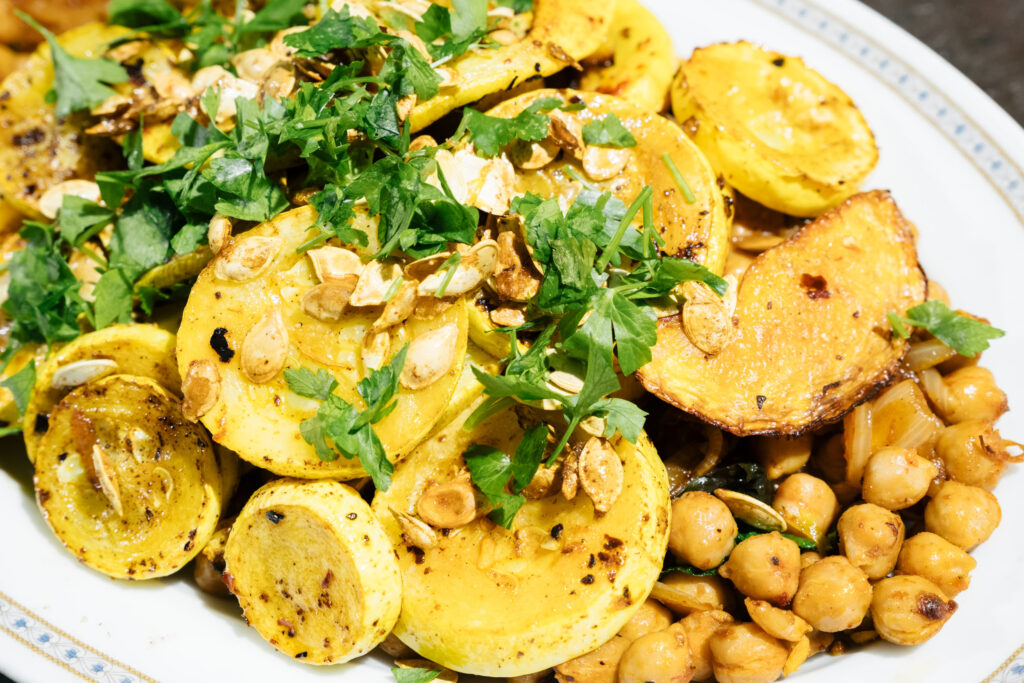
sautéed squash with chickpeas and yogurt sauce
Squash — with its simplicity and heartiness — can brighten up any meal, especially in the winter months. And sautéed squash is both comforting and nutritious.
For this dish, I used yellow squash from the store and a kabocha squash that we grew in our garden, but the recipe works just as well with any kind of squash you can get your hands on. Reserving and roasting the squash seeds is a great way to add extra crunch + texture and use every part of the vegetable!
The fragrant spices in the sautéed squash and chickpeas pair beautifully with the cooling yogurt sauce, which adds a tangy flavor and protein. I use a microplane to grate the garlic and zest the lemon which ensures a fine, even texture.
ingredients
for the squash and chickpeas
- 4 tablespoons extra virgin olive oil
- 2 yellow squash, sliced
- 1 kabocha squash, peeled and sliced, with seeds reserved
- 2 ½ tablespoons kosher salt, divided
- 1 ½ tablespoons freshly ground black pepper, divided
- 1 can chickpeas, rinsed and drained
- ½ teaspoon cumin
- 1 teaspoon smoked paprika
- 1 ½ teaspoons aleppo pepper
- 1 teaspoon crushed red pepper
- ¼ teaspoon juniper berries, crushed
- ¼ teaspoon coriander seeds, crushed
- ½ cup parsley, chopped
for the yogurt sauce
- 1 cup whole milk greek yogurt
- 1 garlic clove, grated
- 2 teaspoons lemon zest
- 2 tablespoons lemon juice
- ¼ cup parsley, chopped
- ½ teaspoon kosher salt
- ½ teaspoon freshly ground black pepper
steps
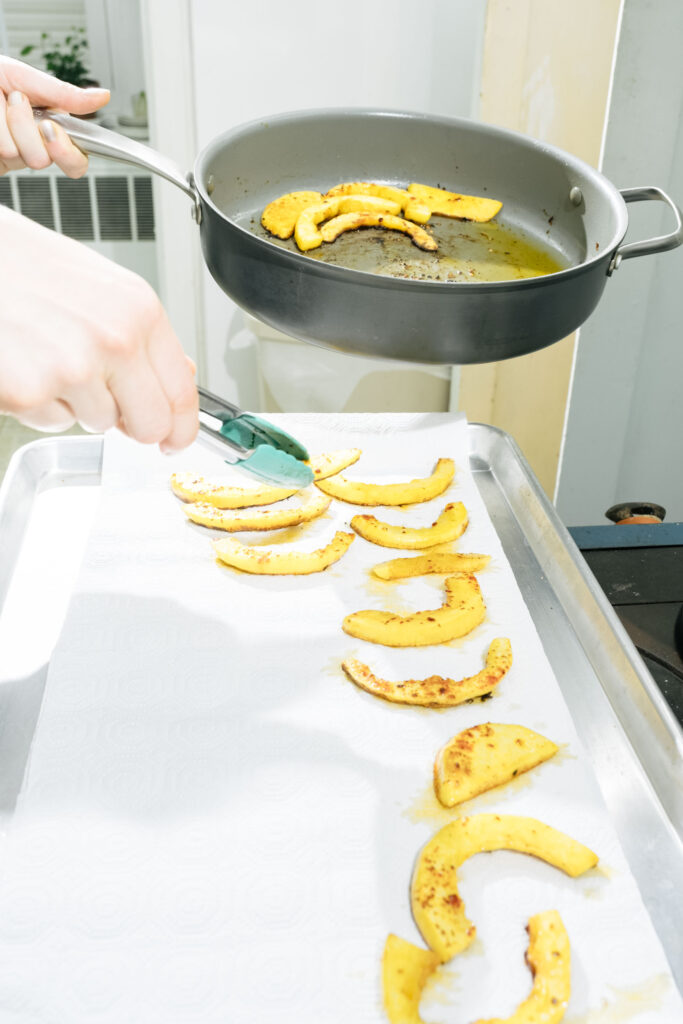
Preheat the oven to 425°F. Rinse the squash seeds and place on a baking sheet lined with parchment paper. Season with ½ tablespoon kosher salt, ½ tablespoon black pepper, and ½ teaspoon of aleppo pepper. Roast until crispy and golden, about 15 minutes.
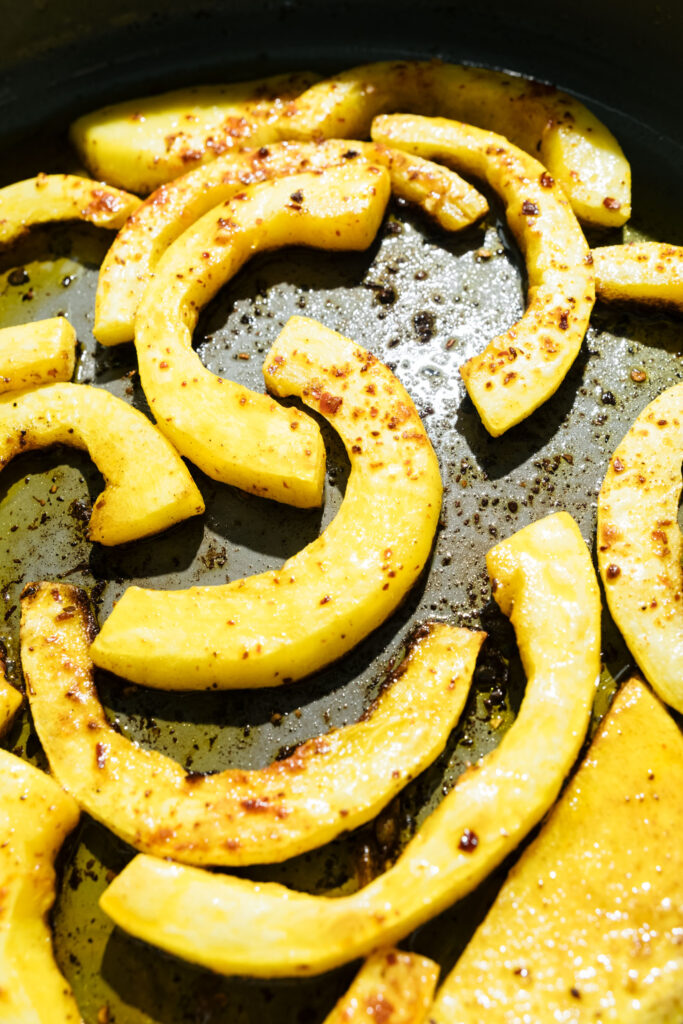
Meanwhile, heat 3 tablespoons of olive oil in a large skillet over medium heat. Add the cumin, smoked paprika, aleppo pepper, crushed red pepper, crushed juniper berries, and coriander seeds. Turn the heat to medium-high and add the first batch of squash, being careful not to overcrowd the pan. Cook on one side for 6 minutes, flip, then cook for another 6 minutes. Transfer to a sheet pan and cook the next batch of squash until all the squash has been cooked.
Remove all of the squash from the pan and add the remaining tablespoon of olive oil. Add the chickpeas and cook over high heat until they begin to crisp, about 7 minutes.
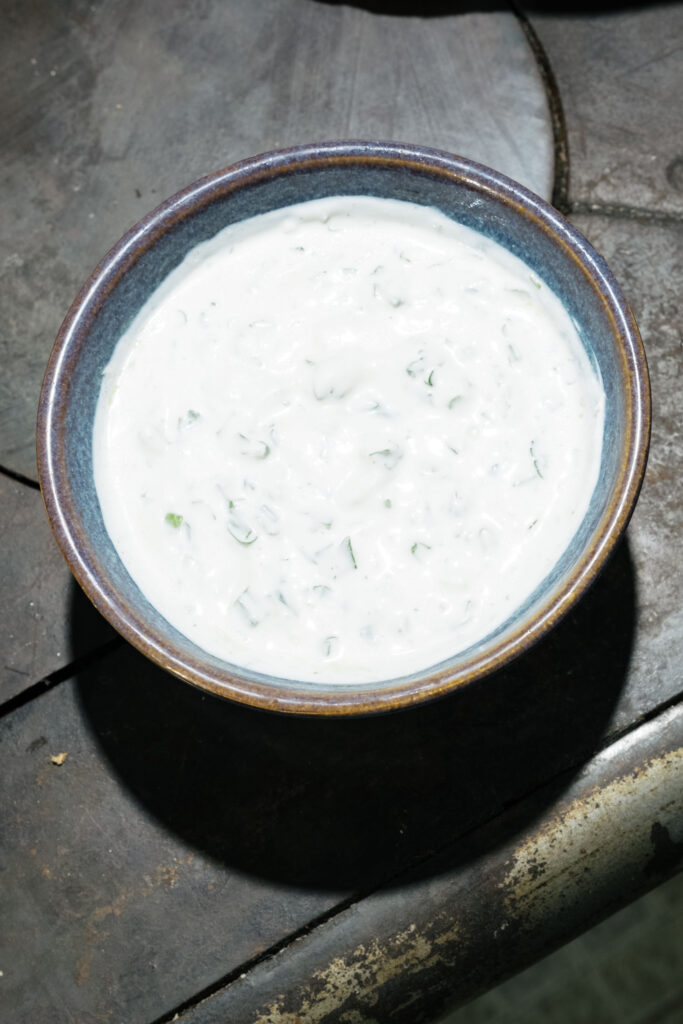
While the chickpeas crisp up, make the yogurt sauce. Place the greek yogurt into a bowl and grate the garlic into it. Add salt, pepper, lemon zest, lemon juice, and ¼ cup parsley. Mix all the ingredients until they are evenly combined.
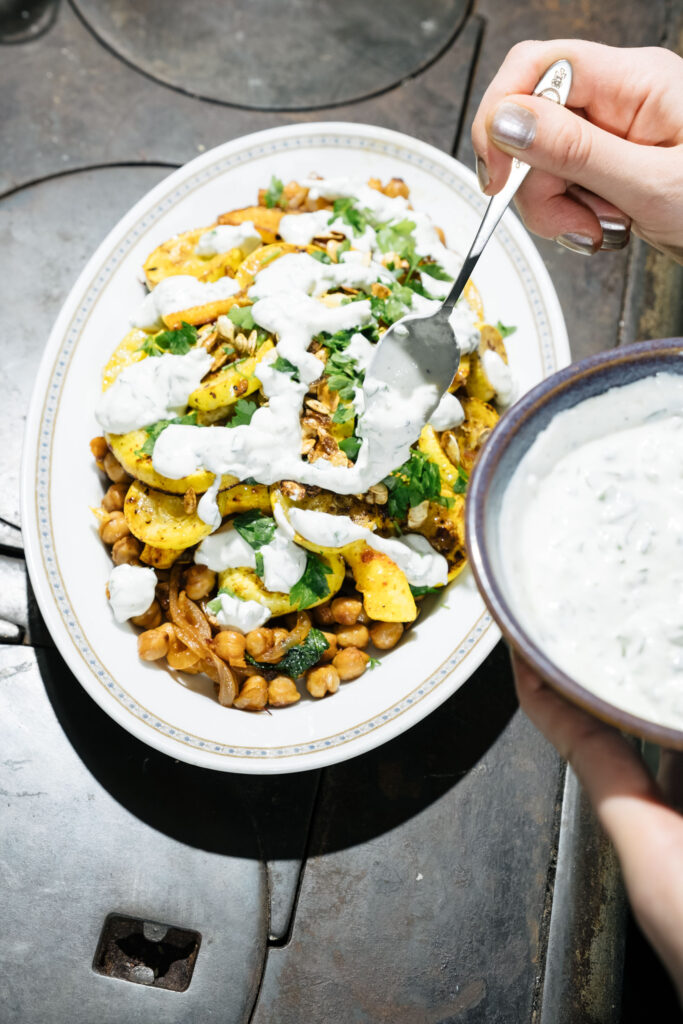
To serve, top the squash with roasted seeds, ½ cup chopped parsley for garnish, and dollops of yogurt sauce.
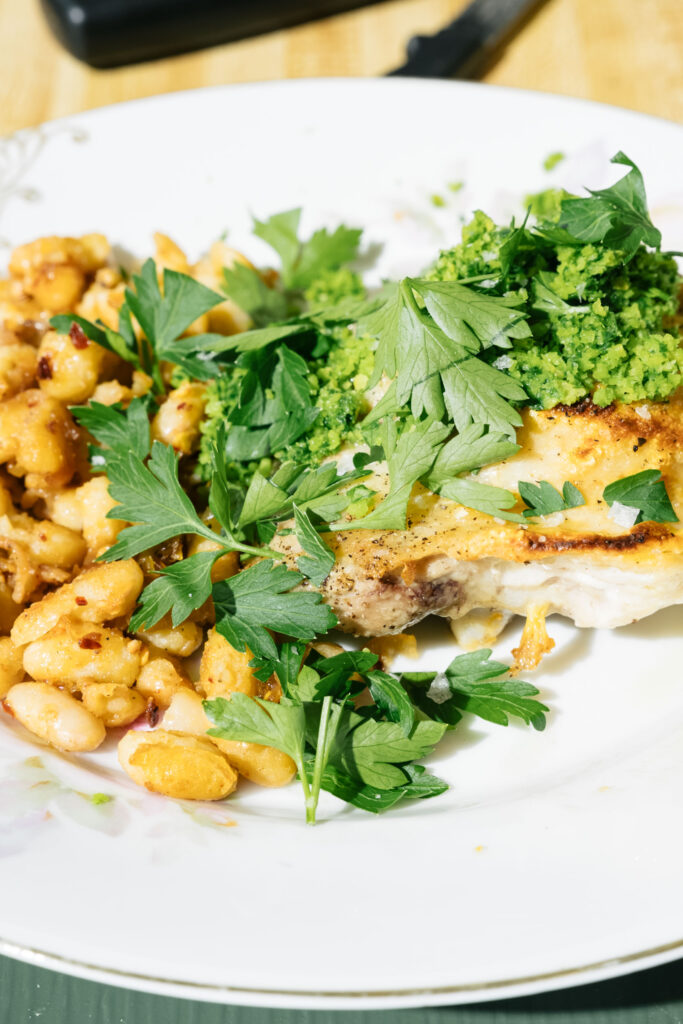
chicken thighs with spicy white beans and gremolata
Chicken thighs and gremolata is an easy one-pan meal that is delicious, fast, and inexpensive to make. Searing the chicken thighs then using the rendered fat to cook the beans maximizes flavor and makes a can of white beans taste more delicious than you ever thought was possible. It is a totally self-contained dish as you don’t even need any additional oil for cooking.
Gremolata is traditionally served with the Italian specialty osso bucco, which is a braised veal shank, as a refreshing condiment for the rich dish. Here, it brightens up a rather beige meal. The versatile combination of parsley, garlic, and lemon zest can balance out and liven up any dish.
ingredients
for the chicken and beans
- 4 bone-in, skin-on chicken thighs
- 1 tablespoon kosher salt
- 2 teaspoons freshly ground black pepper
- 1 teaspoon crushed coriander seeds
- 1 teaspoon aleppo pepper
- 1 teaspoon cumin
- 1 teaspoon smoked paprika
- ½ teaspoon crushed red pepper
- 1 can white beans (cannellini, great northern, navy) drained and rinsed
- Juice of 1 lemon (about 2 tablespoons)
- 1 teaspoon olive oil (for drizzling)
- ¼ cup parsley, loosely packed (for garnish)
- Freshly grated parmesan cheese (for garnish)
for the gremolata
- 1 cup parsley
- 1 garlic clove
- Peel of one lemon
steps
Preheat the oven to 350°F. Heat a large, oven safe skillet (I use cast iron) on medium high heat. Generously season the chicken thighs with salt and pepper and place in the pan. Cook for about 7 minutes then flip to the other side and cook for another 7 minutes. Remove from the pan.
Add coriander seeds, aleppo pepper, cumin, smoked paprika, and crushed red pepper to chicken fat in pan. Cook for 1 minute to season the fat. Add beans and cook for 2 minutes until evenly combined. Add lemon juice and mix to combine.
Add the chicken thighs back into the pan with the beans and place in oven for 20 minutes.
Meanwhile, add parsley, garlic clove, and lemon peel to a food processor and pulse until the mixture is evenly combined.
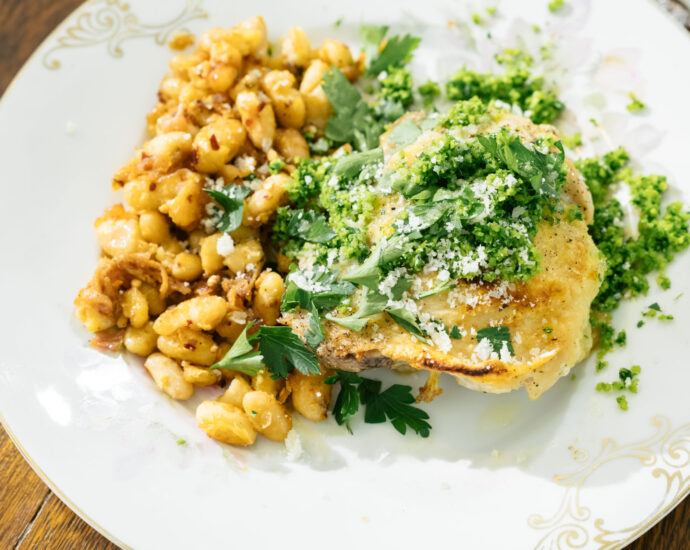
Serve gremolata over chicken and beans with a drizzle of olive oil.

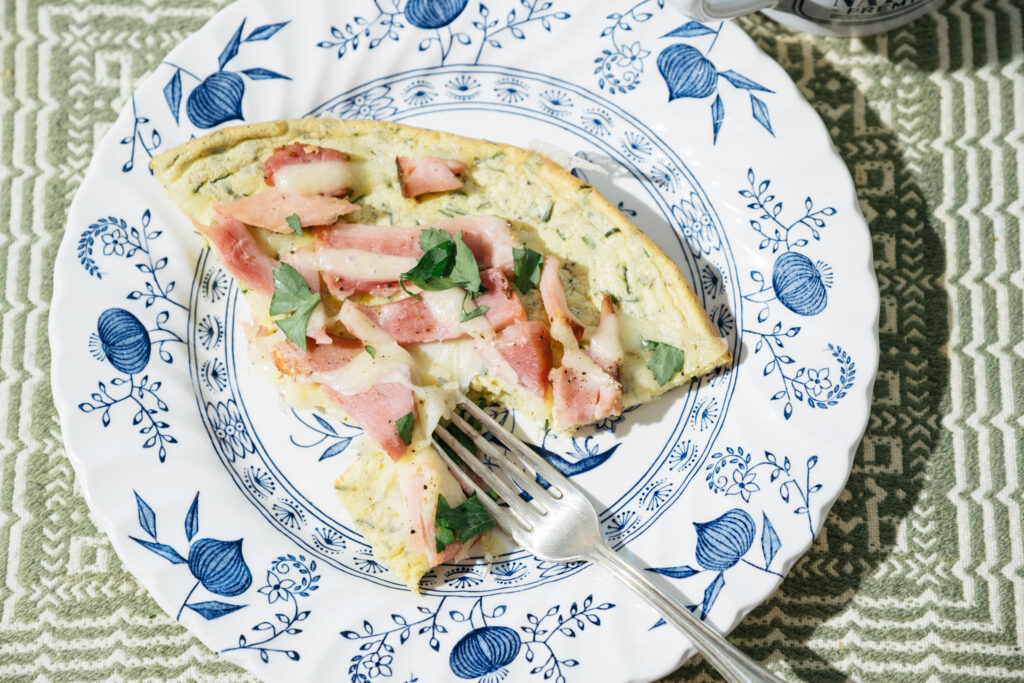
ham and cheese dutch baby with maple dijon drizzle
A dutch baby, also known as a German pancake, is a crowd pleaser in every way. It captivates children and adults alike when it puffs up in the oven into a fluffy, hearty delight, similar to a popover or Yorkshire pudding. So, not only is a dutch baby incredibly satisfying and delicious to make, it is also entertaining. On top of that, it is simple and can be used as a base for any number of toppings including, meat, cheese, vegetables, or fruit, and consumed any time of day!
This ham and cheese dutch baby with maple dijon drizzle is kind of like an open-faced sandwich meets omelette. It is sweet and salty and savory with herby bits throughout. A ham and cheese dutch baby is an excellent meal or snack, all day long.
NOTE: It is very important not to open the oven while the dutch baby cooks, to prevent it from deflating prematurely, something that tests my patience, but that I promise is rewarding!

serves 2
ingredients
- 3 eggs
- ½ cup milk
- Pinch of salt
- 1 teaspoon chopped chives
- 1 teaspoon chopped parsley
- 1 teaspoon dried herbs de Provence
- 1 teaspoon freshly grated nutmeg
- 1 teaspoon lemon zest (optional)
- ½ cup flour
- 4 tablespoons butter or refined coconut oil (I use a mix of the two)
- 6-8 ounces ham, bacon, or rendered pancetta
- 8 ounces swiss or gruyere cheese, shredded
- 2 tablespoons chopped parsley, to garnish
- 2 tablespoons dijon mustard
- 2 tablespoons pure maple syrup
steps
Preheat the oven to 425°F. Place a cast iron skillet in the oven and allow it to heat.
In a large bowl, beat the eggs until they are light and fluffy. Add the milk and continue to beat. Add the salt, chives, parsley, herbs de Provence, nutmeg, lemon zest if using, and mix. Beat in the flour until it is evenly combined and the batter has been thoroughly blended. Let sit for 15-20 minutes.
Remove the skillet from the oven and add butter or coconut oil. Swirl it around until it melts then pour in the batter.
Bake it in the oven for 17-20 minutes until it begins to puff up and become golden.
Add the mustard and maple to a small bowl and evenly mix.
Remove dutch baby from oven and layer on ham and cheese. Return to oven and cook for another 4 minutes or until cheese has melted. Drizzle with maple dijon and parsley.

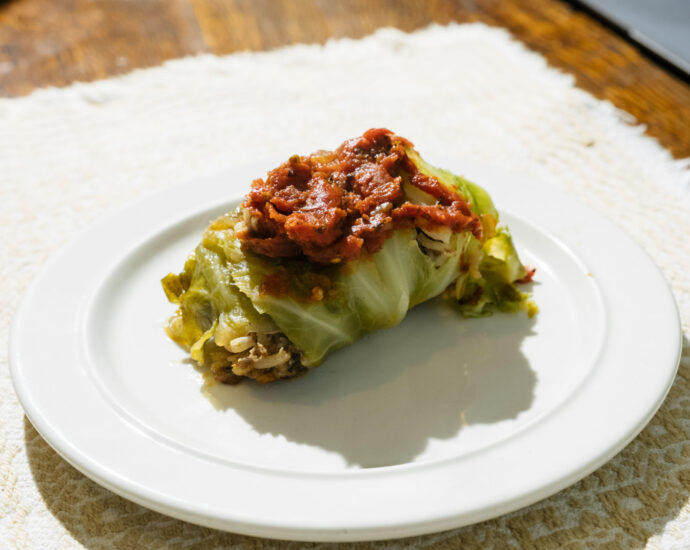
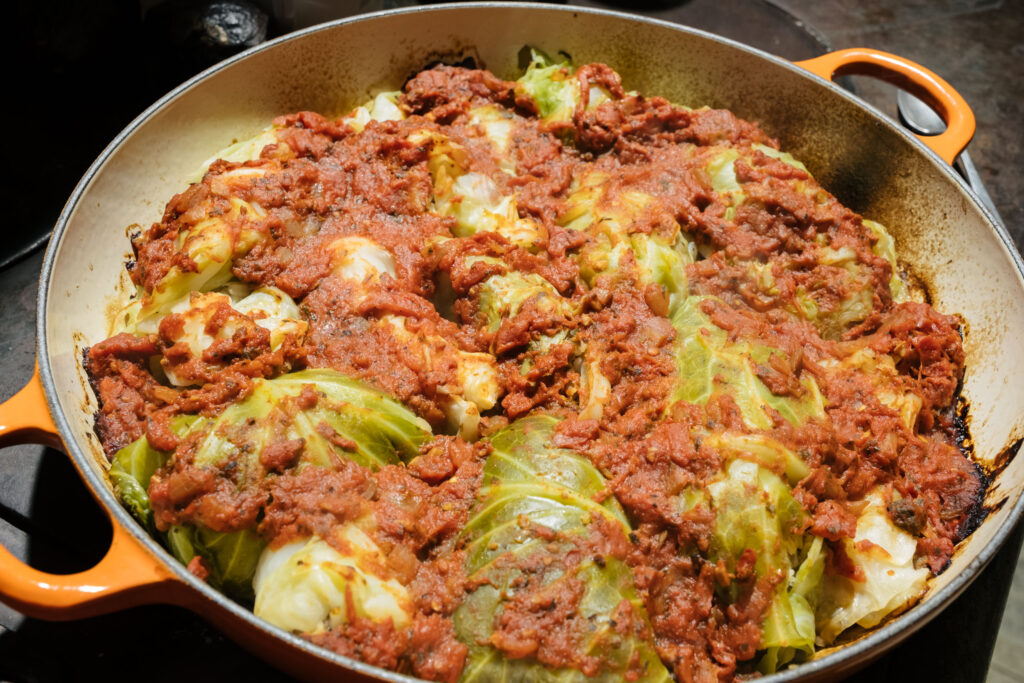
Polish stuffed cabbage (golumpki)
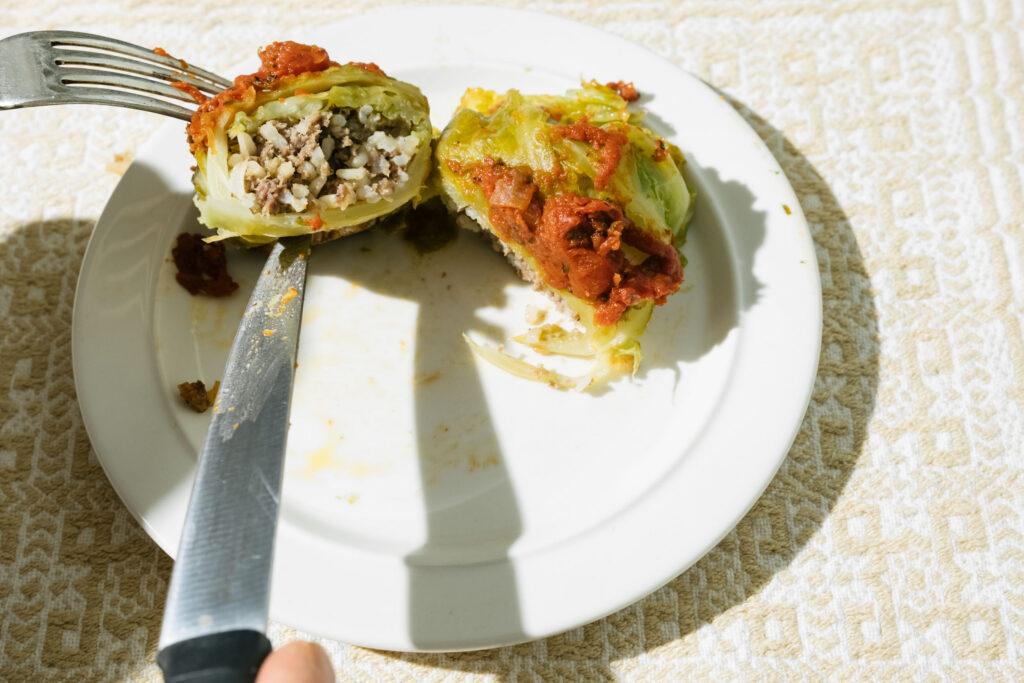
Polish stuffed cabbage, also known as Golumpki or Gołąbki, is a classic Central European dish. Everyone makes it slightly differently, but it is incredibly forgiving in that way. The cabbage is boiled in salty water which not only flavors and tenderizes it but also enhances its vibrant green color. The filling is sort of like a meatball or a meatloaf – it is filled with ground beef, spices, and rice, bound together by an egg.
This golumpki recipe is a true ode to the cruciferous vegetable and is versatile, economical, and delicious. My grandma always cooked stuffed cabbage on the stove, simmered in a covered pan, but I bake mine in the oven. Golumpki is a cozy, warming meal that will comfort and satisfy you.
ingredients
- 1 cup rice
- 1 medium white onion, diced
- 1 ½ cups cheap white wine
- 1 tablespoon olive oil
- 1 large head green cabbage, cored
- 1 tablespoon kosher salt
- 1 ½ pounds ground beef
- 1 teaspoon garlic powder
- 2 teaspoons salt, divided
- ½ teaspoon freshly ground pepper
- 1 egg
- 1 ½ cups tomato sauce
steps
In a small pot, heat the olive oil. Add the onion and cook until translucent and beginning to brown. Add the rice and wine and bring to a boil. Turn down heat, cover, and simmer for 20 minutes. (You know it’s done when you can see that the onion is at the top and the liquid has absorbed into the rice).
Meanwhile, preheat the oven to 350°F. Bring a large pot of water and 1 tablespoon kosher salt to a boil. Add the head of cabbage and cook for 15 minutes, turning with tongs to ensure all sides are cooked. Remove loose leaves as they fall off and let cool.
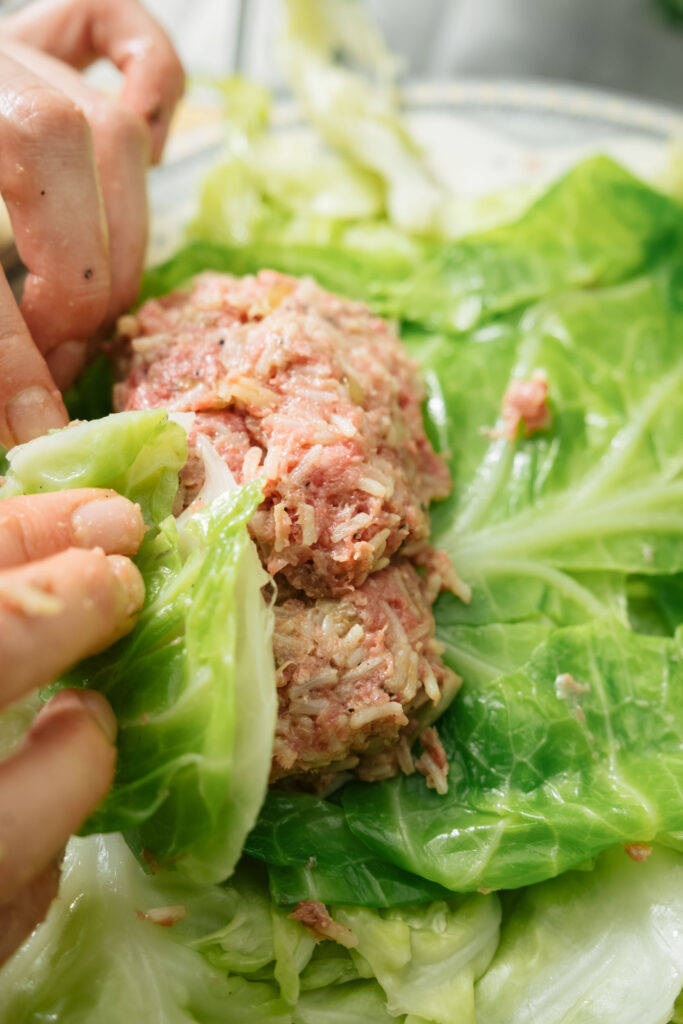
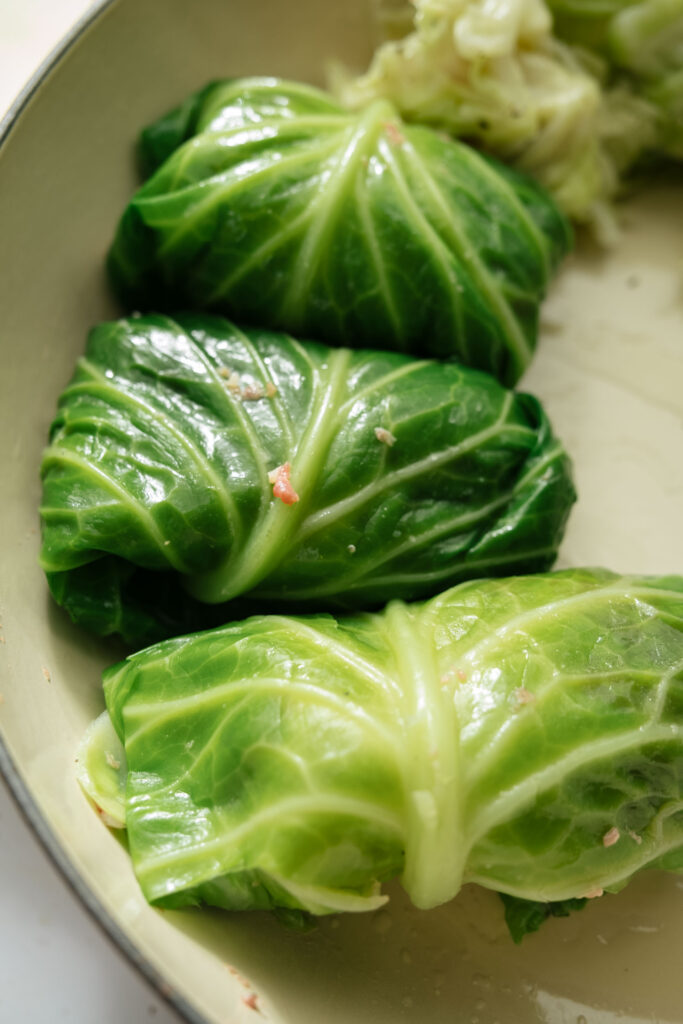
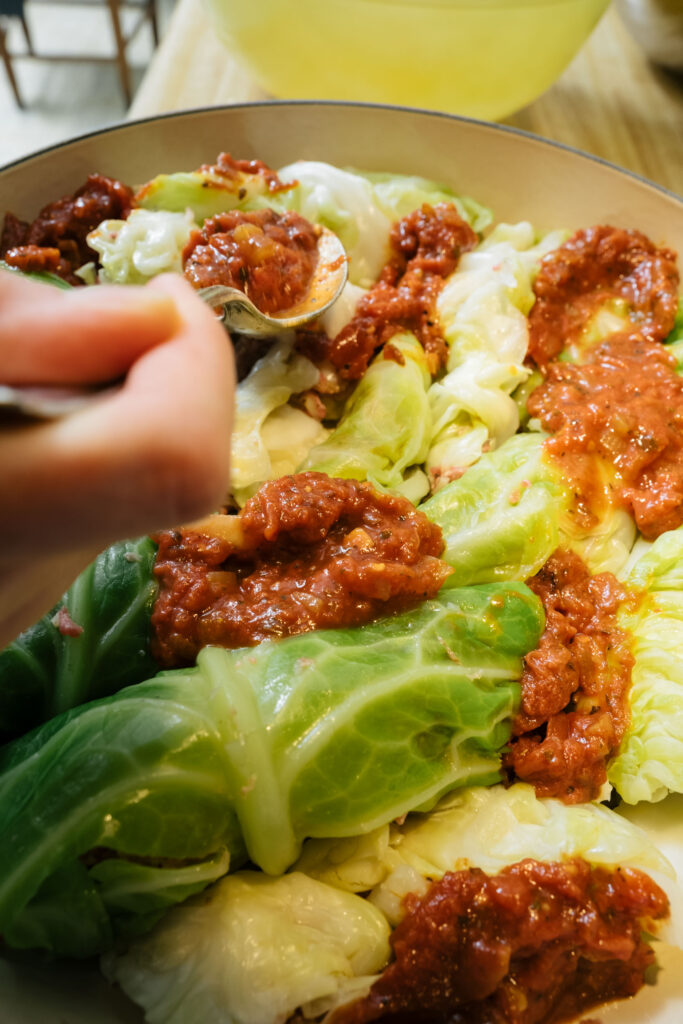
Combine the raw ground beef, cooked rice, garlic powder, salt, pepper, and egg in a large bowl. Mix with your hands to ensure even combination. Fill a handful of meat mixture in a leaf of cabbage and roll it up, starting at the stem. Fold over the sides and tuck the stuffed cabbage into a pan lightly greased with olive oil. Thinly cover with tomato sauce.
Cover with lid or foil and bake for 50 minutes. Remove from the oven and let sit for 10 minutes. Sprinkle evenly with remaining 1 teaspoon of salt.
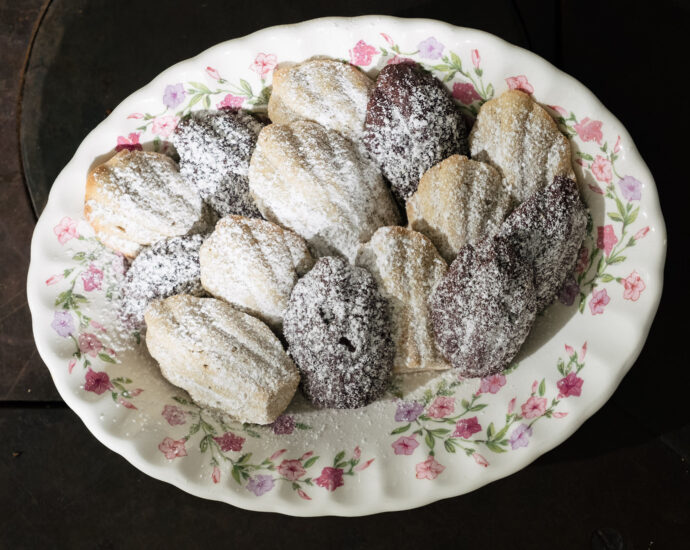
madeleines, two ways
I first made Madeleines with my friend Louise. Her mom is French, and she is deeply influenced by her French heritage. It was Louise who taught me to use orange zest in lieu of the traditional lemon zest, which she learned from her dad.
These are two takes on the classic the madeleine. I love the combination of spices like cinnamon and cloves with orange – it reminds me of decorating oranges with whole cloves as a holiday art project as a child. I hope they invoke the cozy seasonal joy for you that they do for me! And chocolate is… chocolate. And both are dusted with powdered sugar.
The one piece of equipment you need is a madeleine pan, but I believe it is worth the investment. This is the mold I use, as I prefer silicon. I find it easy to remove the madeleines from the pan and clean it.
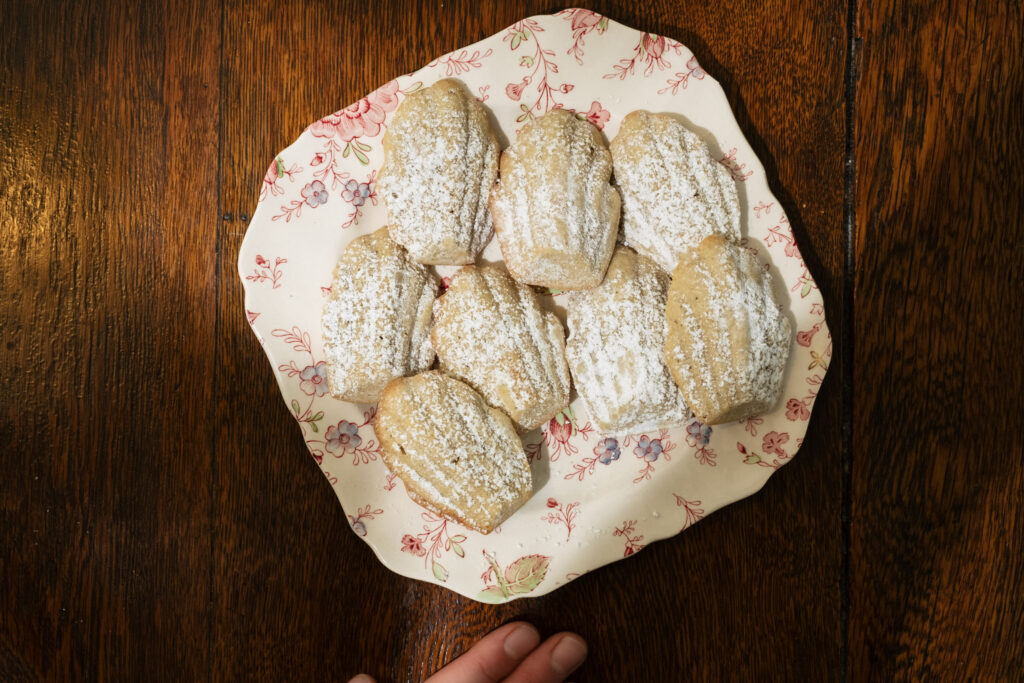
spiced madeleines
ingredients
- 2 eggs
- ½ cup brown sugar
- 1 teaspoon almond extract
- 5 dashes orange bitters (optional)
- 1 tablespoon orange zest
- 1 cup all-purpose flour
- ¼ teaspoon ground cloves
- ¼ teaspoon cinnamon
- ¼ teaspoon kosher salt
- 10 tablespoons butter
- Powdered sugar
steps
- Preheat oven to 350°F and lightly grease madeleine pans with a neutral oil.
- Melt butter in a saucepan and let cool.
- In a bowl, beat together eggs, brown sugar, almond extract, and orange zest until light and fluffy.
- In a separate bowl, mix together flour, salt, ground cloves, and cinnamon. Slowly add this mixture into the egg mixture until combined. Slowly pour melted butter into the bowl until the mixture emulsifies.
- Fill each mold with batter and bake for 12-14 minutes until the cakes have puffed up and are beginning to brown.
- Remove from oven and let cool then remove each individual cake and dust with powdered sugar.

chocolate madeleines
ingredients
- 2 eggs
- ¼ cup granulated sugar
- ¼ cup brown sugar
- ½ teaspoon almond extract
- ½ teaspoon vanilla extract
- 1 teaspoon orange zest
- ¾ cup all-purpose flour
- ¼ cup cocoa powder
- ¼ teaspoon kosher salt
- 10 tablespoons butter
- Powdered sugar
steps
- Preheat oven to 350°F and lightly grease madeleine pans with a neutral oil.
- Melt butter in a saucepan and let cool.
- In a bowl, beat together eggs, brown sugar, granulated sugar, almond extract, and orange zest until light and fluffy.
- In a separate bowl, mix together flour, salt, and cocoa powder. Slowly add this mixture into the egg mixture until combined. Slowly pour melted butter into the bowl until the mixture emulsifies.
- Fill each mold with batter and bake for 12-14 minutes until the cakes have puffed up.
- Remove from oven and let cool then remove each individual cake and dust with powdered sugar.