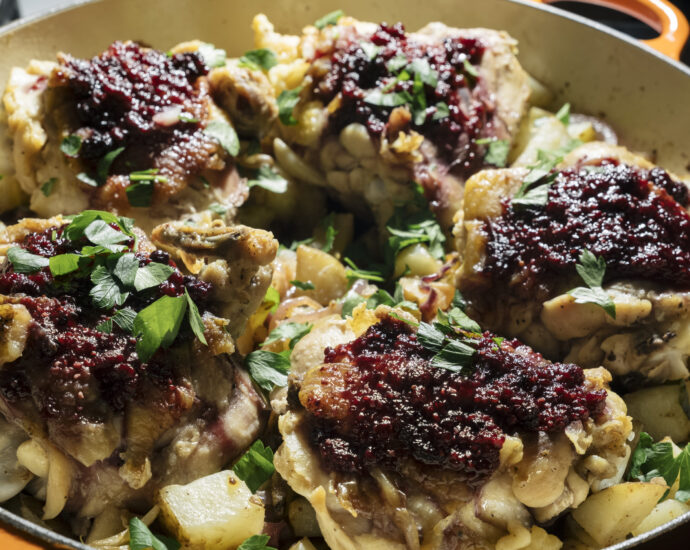
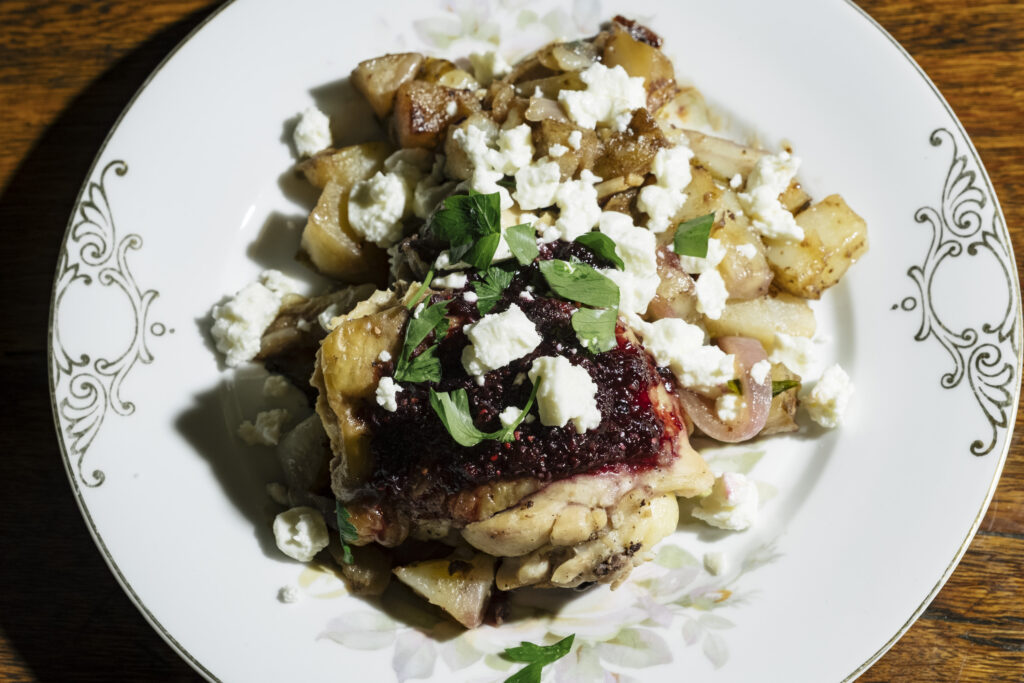
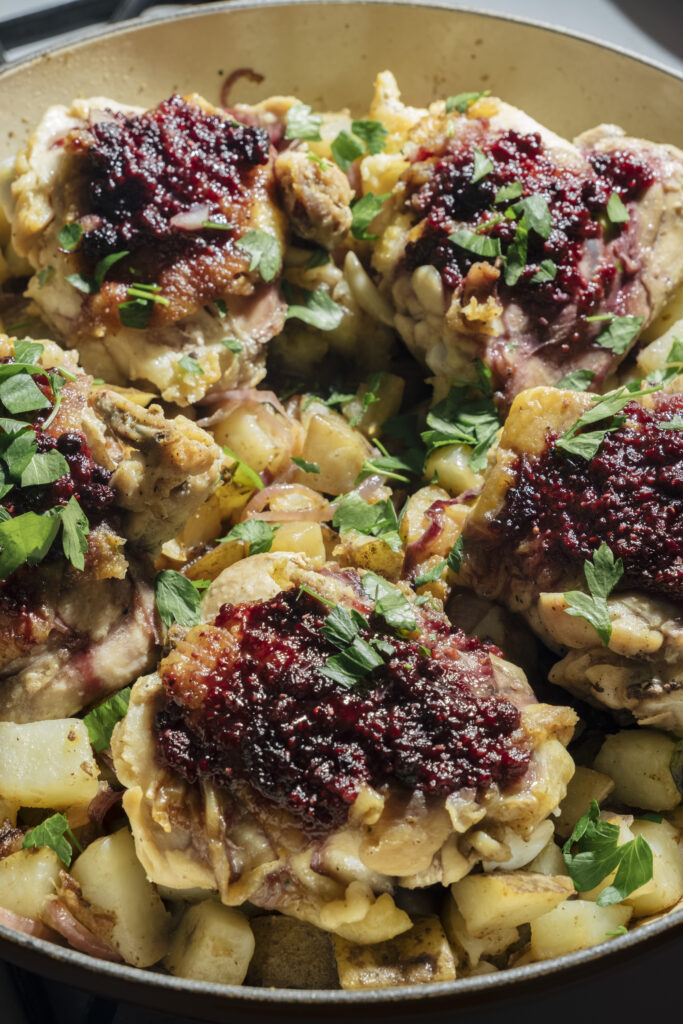
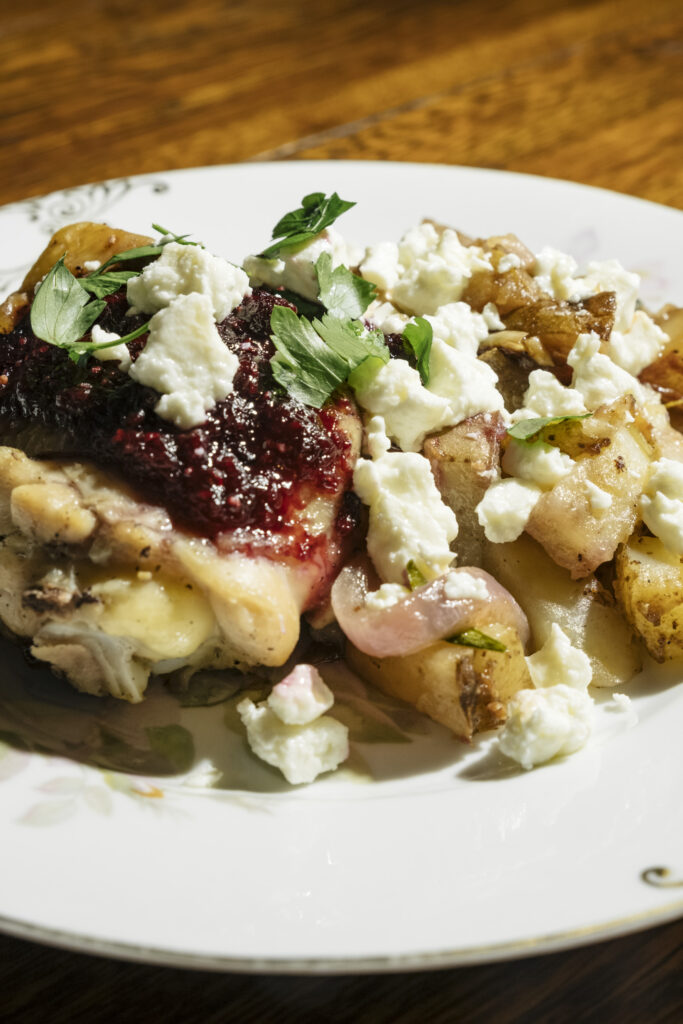
berry jam chicken with feta
In the summertime, I become highly overzealous while foraging for wild berries all across town. The first to appear are mulberries, followed soon after by blackcaps, raspberries, blackberries, wineberries, and blueberries, in that order. This leaves me with a giant load of berries which I usually transform into jam and gift or use throughout the year. The abundance of said jam was the inspiration for this berry jam chicken with feta.
Berry jam chicken with feta is a cozy and simple dish that is easily assembled and cooked on the stove. Par-boiling the potatoes allows them to soften and absorb the layers of flavor from the luscious chicken cooking atop. Salty feta balances the sweetness of the jam and the richness of the potatoes for a meal with profuse flavor sensations.
ingredients
- 2 pounds russet potatoes, chopped into 1-inch pieces
- 5 tablespoons salt, divided
- 2 pounds bone-in skin-on chicken thighs
- 2 tablespoons freshly ground black pepper
- ½ red onion, sliced
- 6 garlic cloves, sliced
- 1 tablespoon fresh oregano, chopped
- 1 tablespoon balsamic vinegar
- 6 tablespoons mixed berry jam
- 1 tablespoon parsley, chopped
- 6 ounces feta, crumbled
steps
Par-boil the potatoes, in a large pot of water with 1 tablespoon of the salt, for 10 minutes. Strain and set aside.
Generously season the chicken thighs on both sides with 2 tablespoons of salt and 1 tablespoon of freshly cracked black pepper. Place the seasoned chicken thighs in a large pan or skillet with a matching lid and brown them, skin-side down, on medium-high heat until the skin becomes crispy, about 12 minutes. Flip the thighs and brown on the other side for another 12 minutes. Remove the chicken thighs from the pot and pour off the grease until about 2 tablespoons of rendered chicken fat remains.
Place the red onion and cook for 4 minutes then add the garlic and oregano. Cook until the garlic is blonde and add the balsamic vinegar. Add the par-boiled potatoes to the pan and cook for 4 minutes until heated.
Place the chicken thighs, skin-side up on top of the potatoes. Spread about 1 tablespoon of jam on top of each chicken thigh. Cover and cook for 35 minutes until chicken is cooked through and the potatoes are soft. Plate the potatoes and chicken and sprinkle a pinch of chopped parsley and 1 ounce of feta on each plate. Serve with a simple salad.
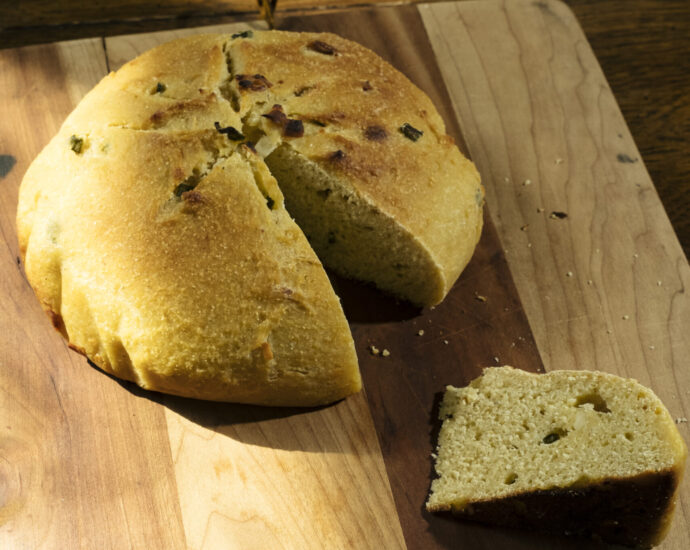
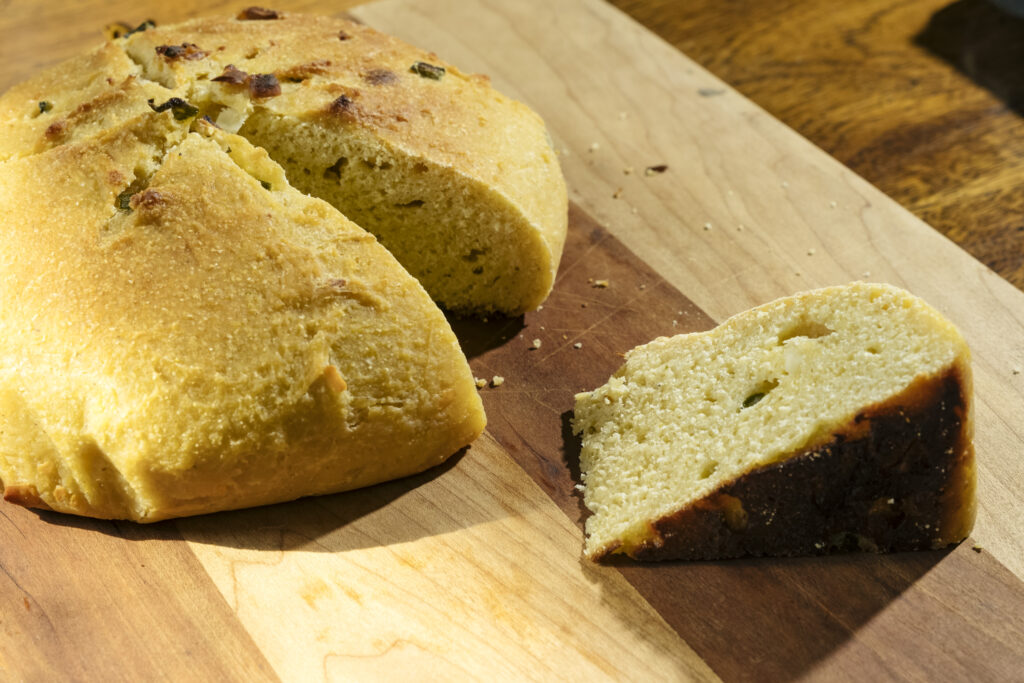
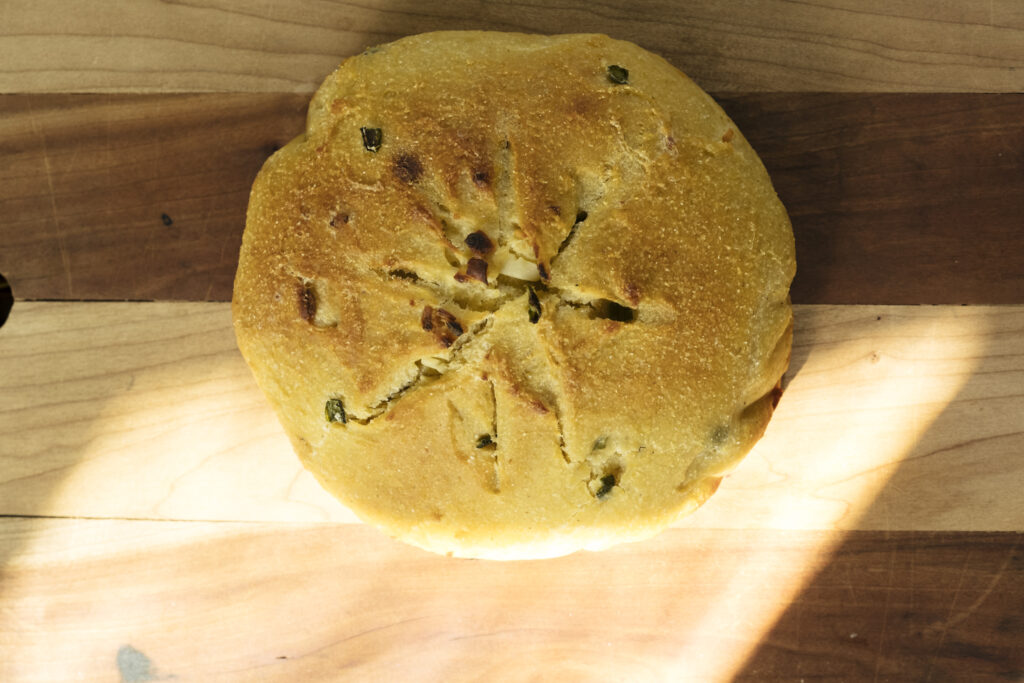
sourdough cornbread
Cornbread is a timeless + festive fall favorite of mine. The only problem that can sometimes arise is a dry and crumbly texture. This sourdough cornbread is enhanced with a bit of volume and tang from a robust sourdough starter and greek yogurt. The greek yogurt ensures even moisture and lightness, coupled with a spring from the wild yeast. Bits of spicy jalapeño pepper and sharp cheddar cheese further enrich this sourdough cornbread into an all-around delight.
Serve sourdough cornbread with a bowl of cozy chili, or toast it up with some salad or soup. It also makes for a delicious sandwich, open-faced grilled cheese, or toast with eggs! Days after baking, turn sourdough cornbread into luscious croutons or toast!
ingredients
- 138 grams / 1 cup yellow cornmeal
- 35 grams / 2 tablespoons sourdough starter
- 165 grams / ¾ cup greek yogurt
- 100 grams / ½ cup brown sugar
- 6 grams / 1 teaspoon / 6g salt
- 2 eggs
- 11 grams / 2 tablespoons jalapeños, chopped
- 59 grams / ¼ cup sharp cheddar cheese, shredded
steps
In a large bowl, mix together the cornmeal, sourdough starter, and greek yogurt until thoroughly combined. Add the brown sugar and salt and mix. Add the eggs, one at a time, until evenly incorporated. Let sit for 1-2 hours then begin to stretch and fold the dough over itself.
As you stretch the dough, layer jalapenos and cheddar over the top of the dough, then fold the stretched part over the top of the jalapenos and cheddar. Repeat until all of the jalapenos and cheddar have been incorporated.
Let the dough sit for 1 hour and repeat the stretch and fold for 4, 90° turns. Let the dough rest 12-14 hours for the bulk fermentation.
When ready to bake, preheat the oven to 475°F and place the loaf of dough on a piece of parchment paper. Bake for 45-50 minutes until the crust turns golden.
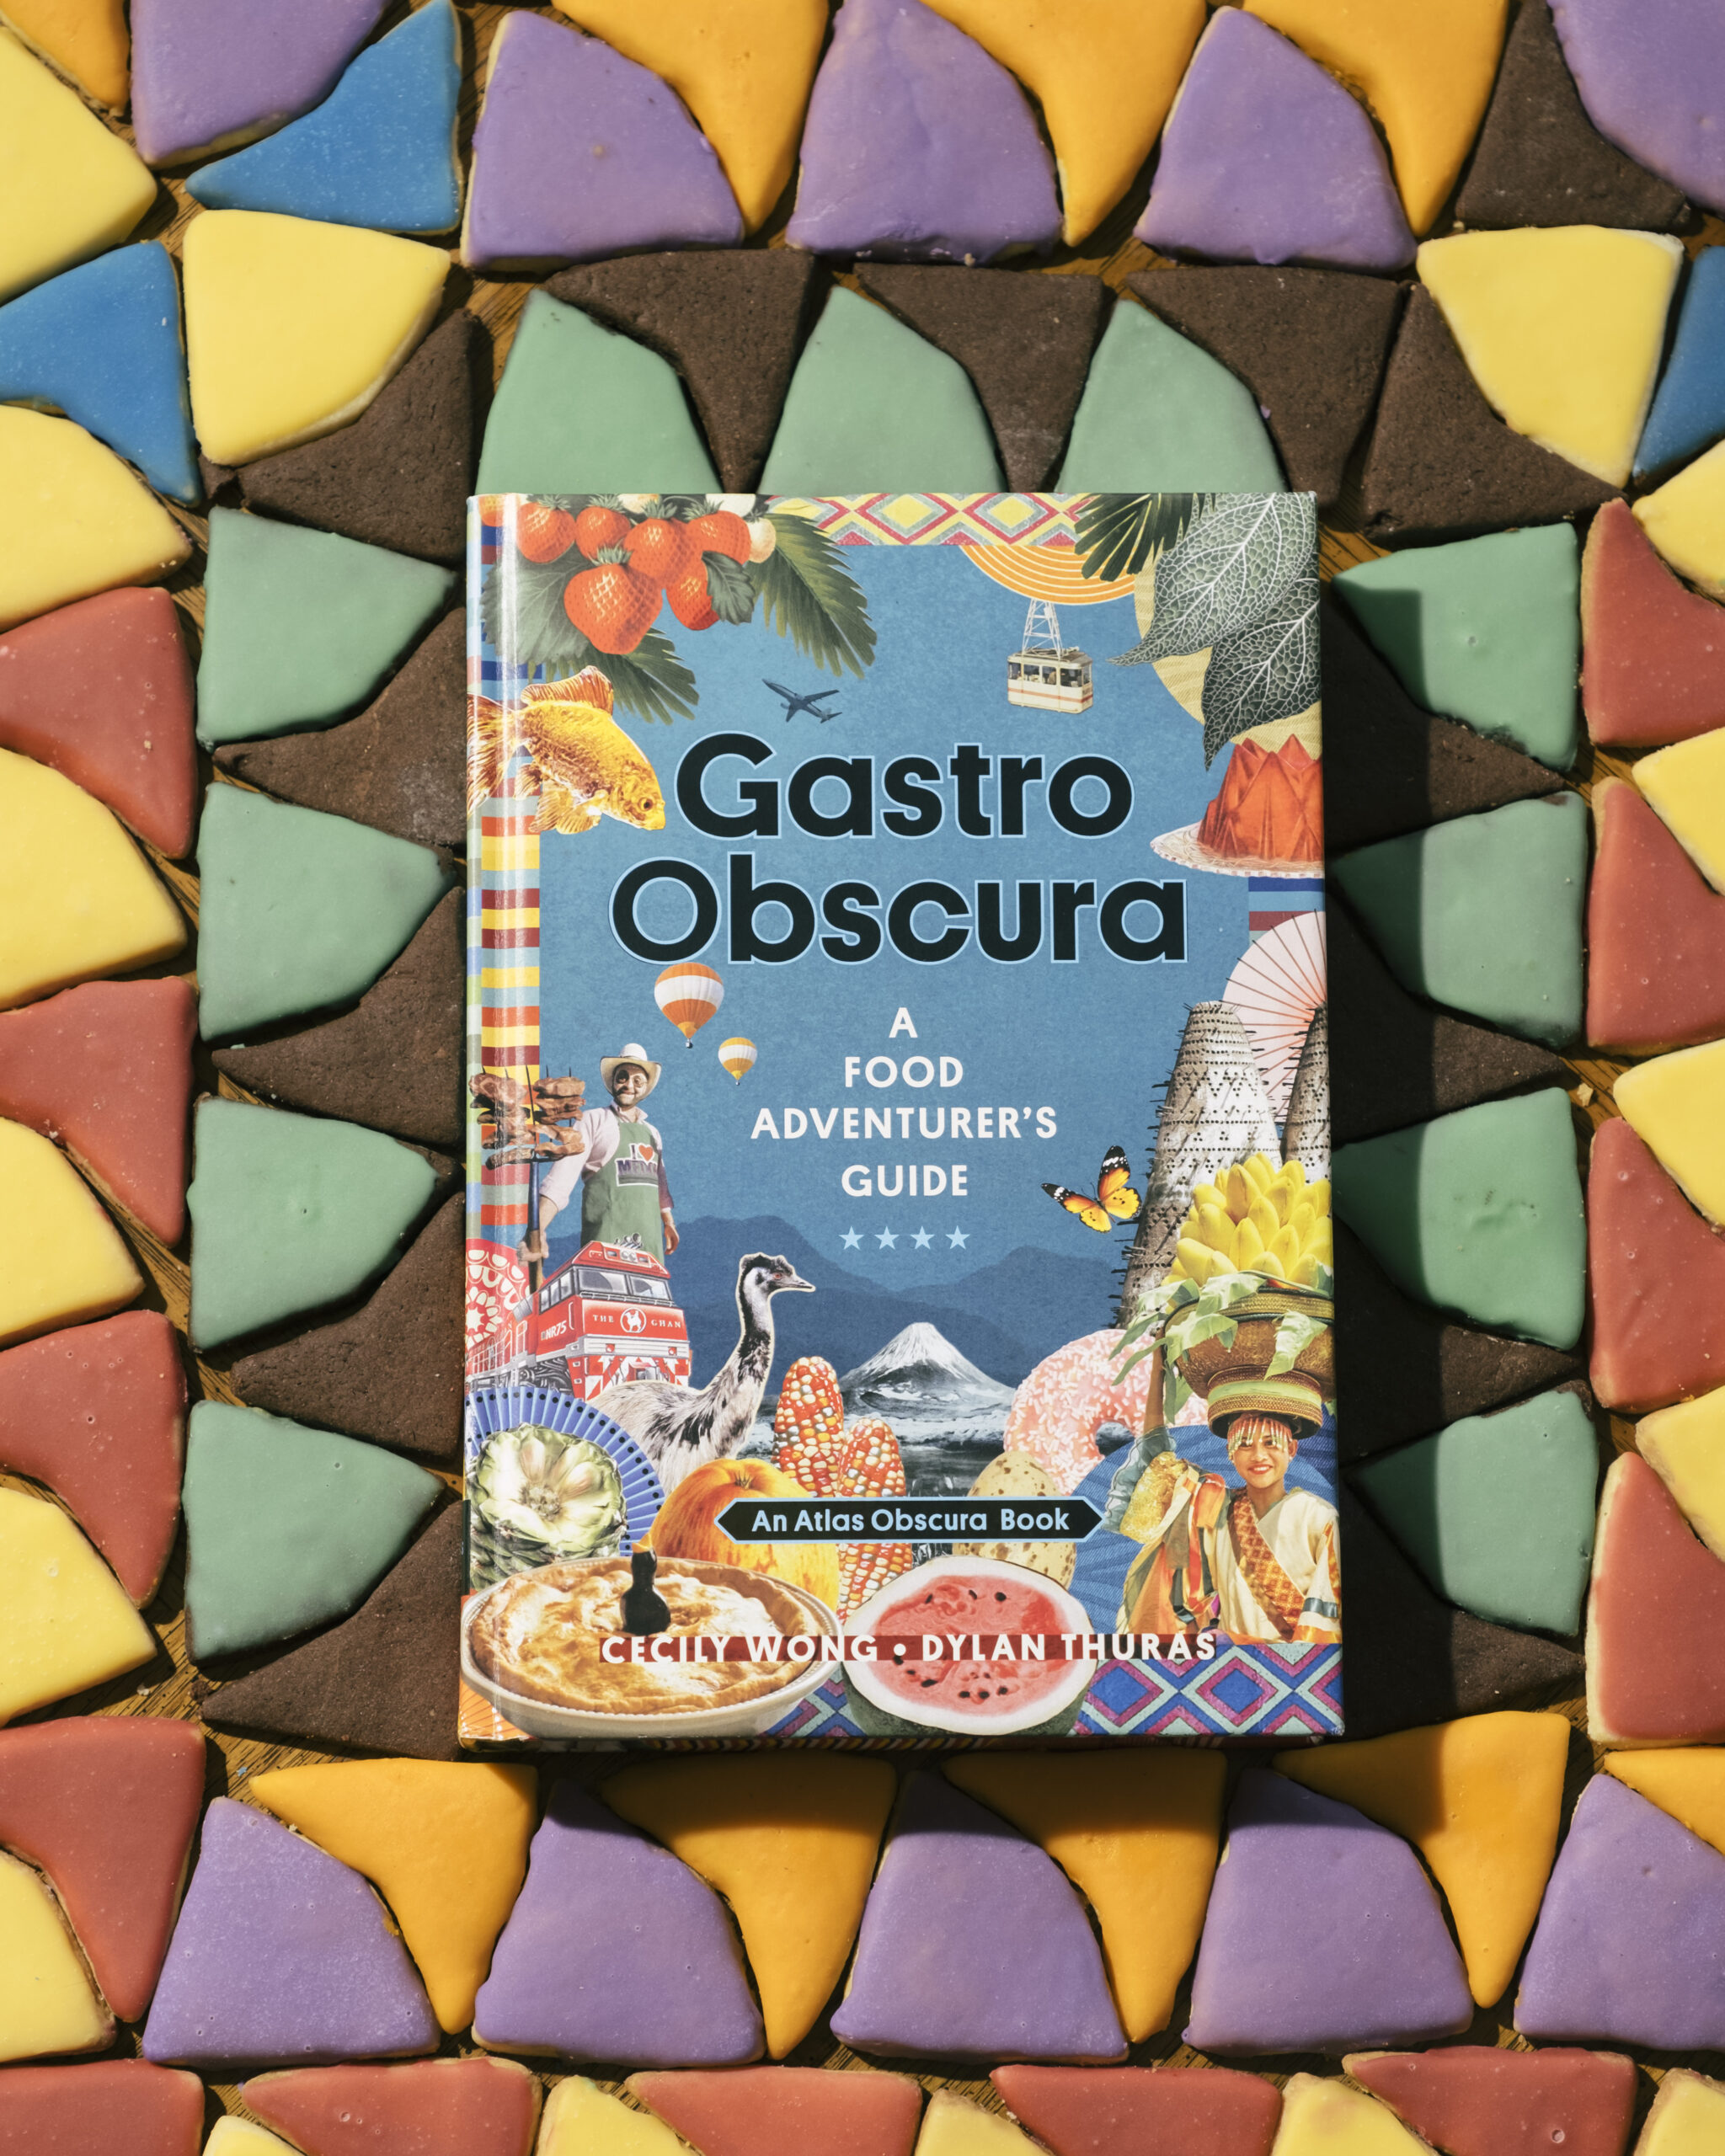
gastro obscura cookies
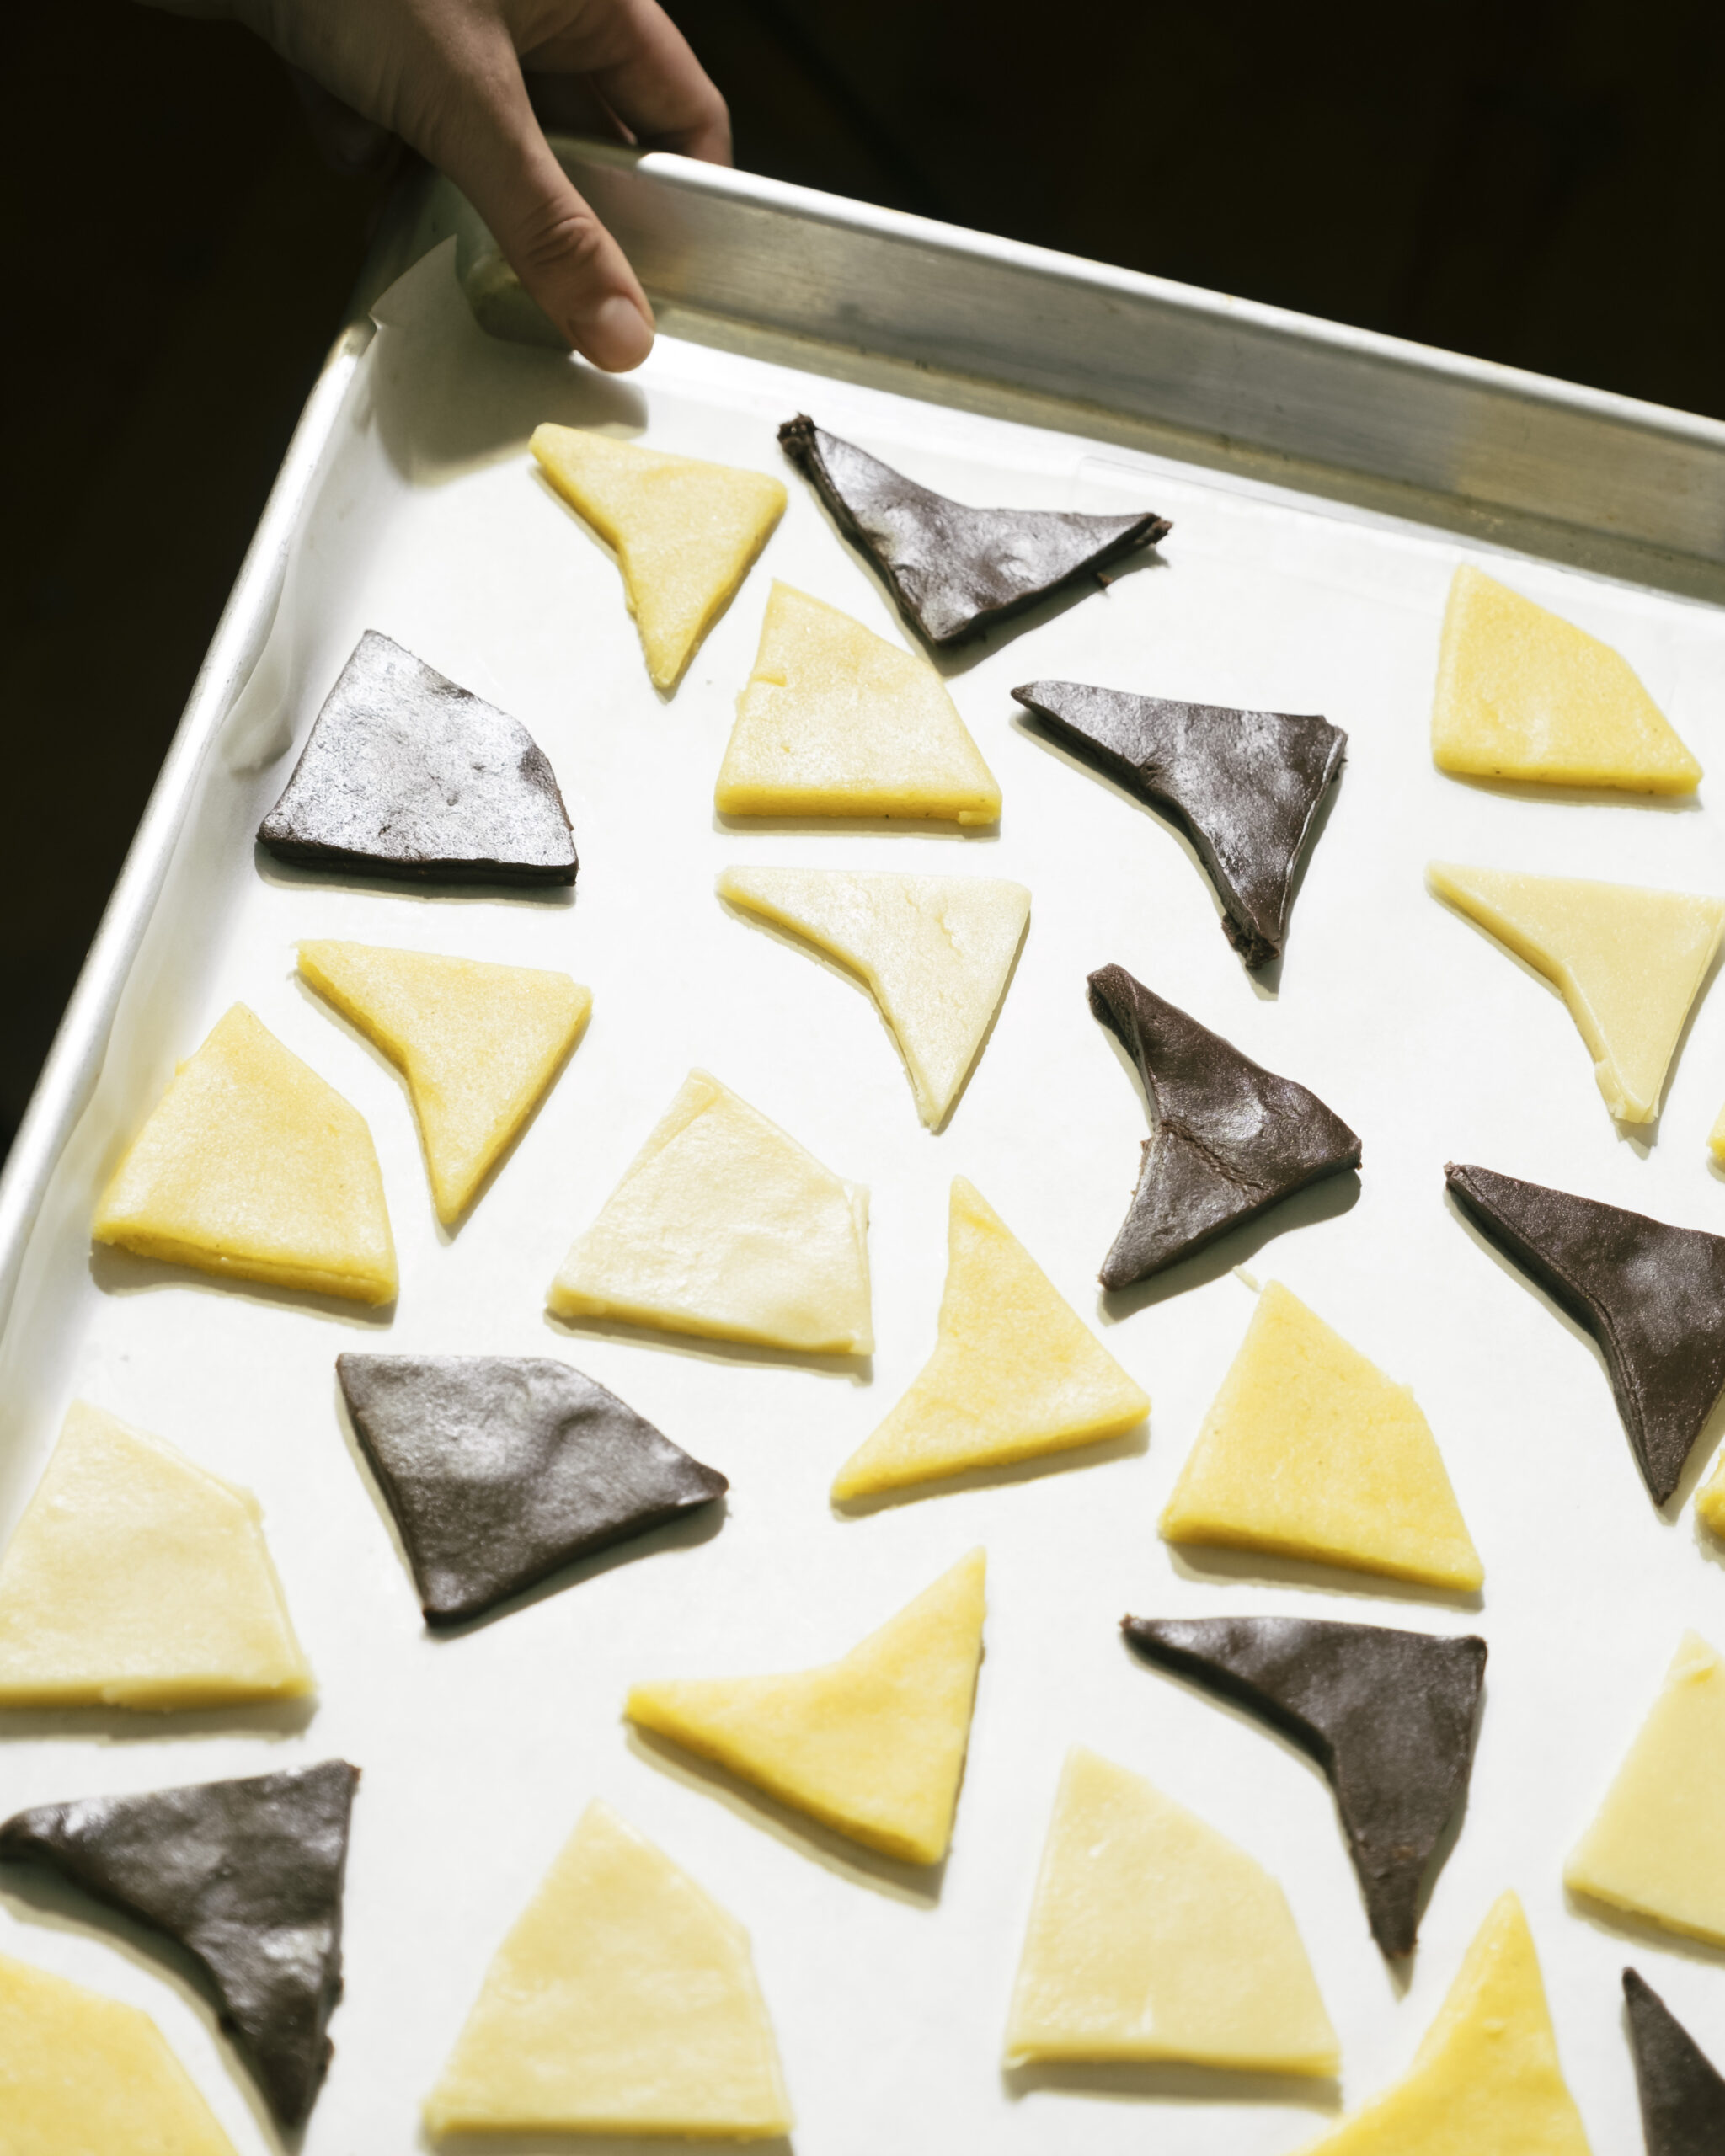
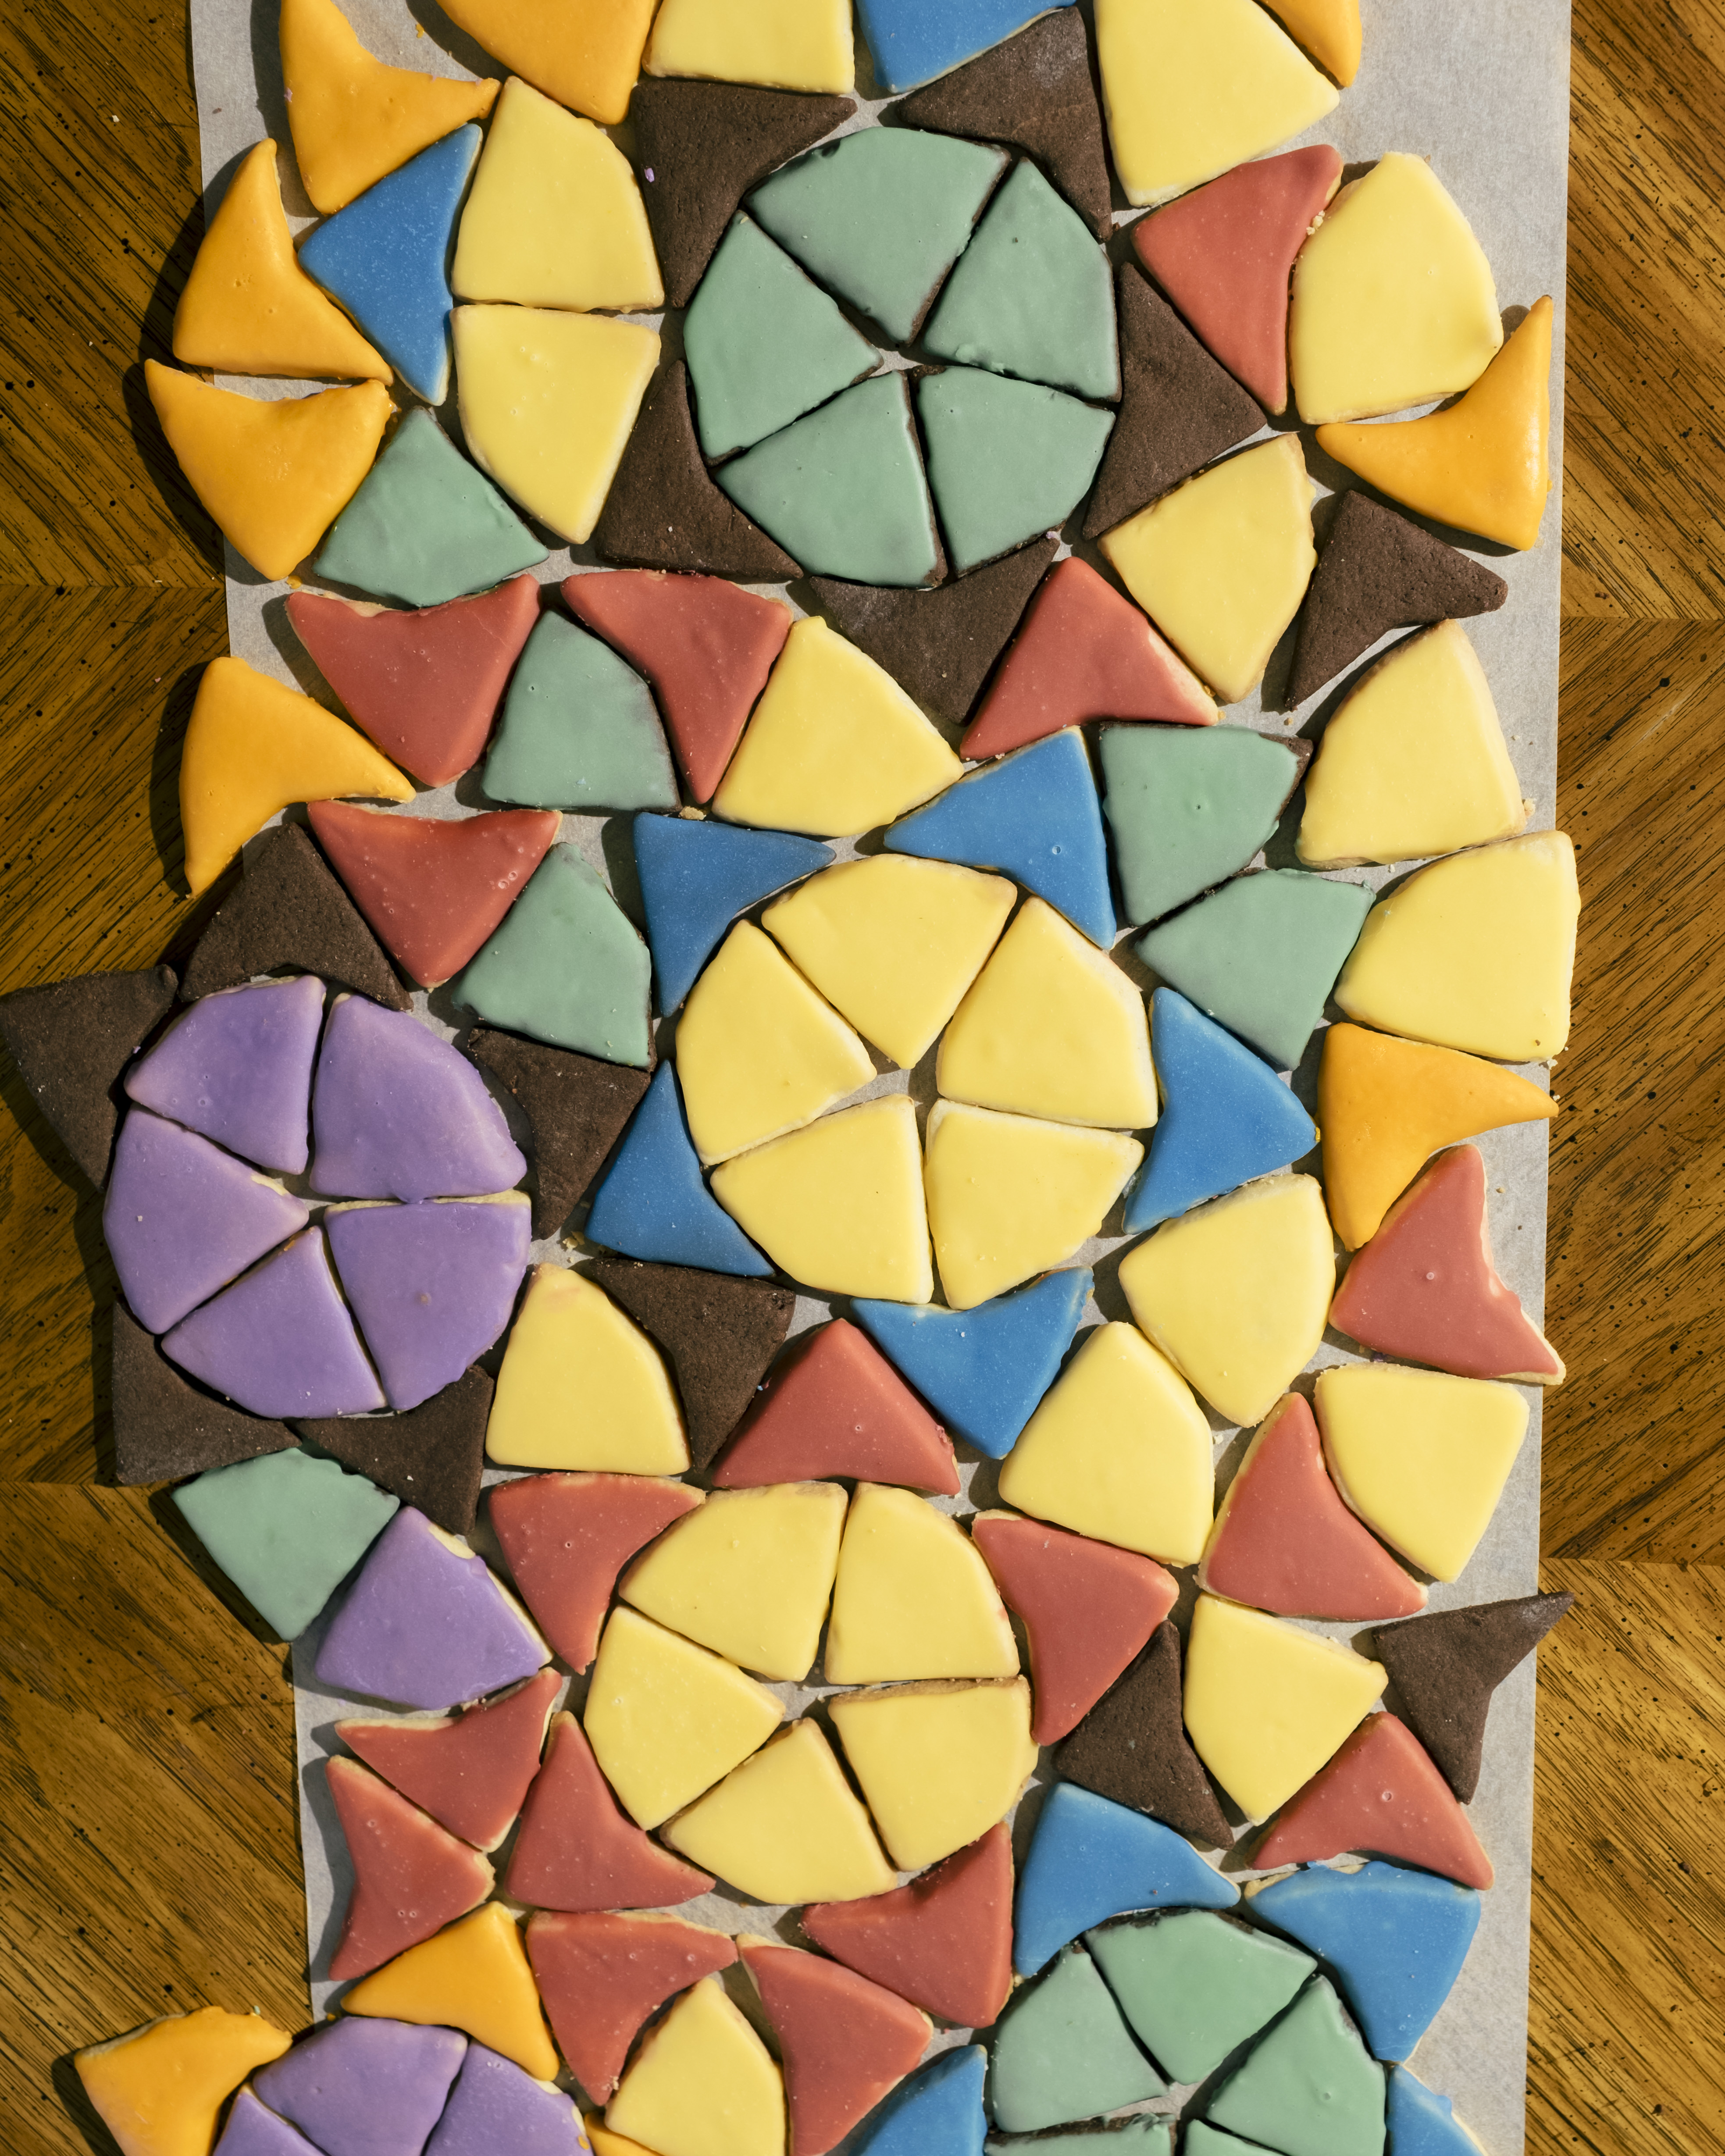
Have you ever heard of tessellations? Tessellations are geometric shapes that fit together perfectly. These cookie cutters from Gastro Obscura: A Food Adventurer’s Guide are tessellations; they create mathematically efficient cookies so that no dough scraps go to waste. They maximize time in addition to dough.
Norwegian chemist Martin Lersch wanted to create tessellated cookie cutters. Lersch adapted them from the tiling of Nobel Prize in Physics winner Roger Penrose. These Penrosian “kite” and “dart” shapes combine to make a rhombus and also solve the age-old baking problem of dough scraps!
Such creative culinary wisdom is what you will find within the pages of Gastro Obscura: A Food Adventurer’s Guide, which is AtlasObscura.com’s compendium of great food adventures. Open the cover and you can dive into obscure culinary history, fascinating cultures and traditions all through the lens of food.
Here are some tasty tessellations to try!

chocolate sugar cookies with mint glaze
Mint and chocolate go together like peanut butter and jelly. Think: peppermint patties, mint chocolate chip ice cream, thin mints, the list goes on and on. These cookies are made from a rich, chocolatey dough and covered with a beautiful mint-green glaze to enhance their classic flavor pairing. Enjoy them as a sandwich around ice cream or alone with a cup of tea or coffee. They will not disappoint.
ingredients
for the dough
- 2 cups all-purpose flour
- ¼ teaspoon salt
- 1 teaspoon baking powder
- ¾ cup cocoa powder
- 1 cup (2 sticks) butter, softened
- 1 cup brown sugar
- 2 eggs
- 1 teaspoon vanilla extract
for the glaze and decoration
- 2-3 tablespoons milk or half and half
- 1 cup confectioners sugar
- 1 tablespoon corn syrup
- 1 teaspoon peppermint extract
- Green food coloring
cookie steps
In a small bowl, mix together flour, salt, baking powder, and cocoa powder. Set aside.
Beat butter and sugar together in a stand mixer with a paddle attachment or using a hand mixer until creamy. Add in eggs and vanilla and mix.
Slowly pour in dry ingredients until dough has formed. Everything should be evenly combined.
Form dough into a ball and wrap in plastic wrap then refrigerate for 1-2 hours until firm. Refrigerating the dough will make it easier to roll out.
Preheat the oven to 375°F and line a baking sheet with parchment paper.
Cut dough into quarters and roll out one of the quarters, you will need extra flour. Use a cookie cutter to cut out cookies and place on a parchment-lined cookie sheet.
Bake for 7-9 minutes until the edges start to crisp and turn golden.
glaze steps
Place all ingredients in a medium-sized bowl and whisk to combine. Dip cooled cookies in glaze and allow to set for about 3 minutes before covering in sprinkles. I like to place the cookies on a cooling rack over a cookie sheet because it allows for easy clean-up! Let the glaze harden completely.
cornmeal cookies with lemon glaze
Cornmeal cookies are one of my favorite cookie doughs to make. Sometimes I roll the dough into a log, brush the edges in egg white and roll them in sugar with chilli flakes or cayenne. Other times I roll it out and cut it into shapes. The dough is truly that versatile. Here, I create cut-out cookies with a light lemon glaze.
ingredients
for the dough
- 1 ¼ cups flour
- 1 ¼ cups cornmeal
- ¼ teaspoon salt
- ¾ cup butter
- ¾ cup sugar
- 1 egg
- 1 tsp. vanilla
for the glaze and decoration
- 2-3 tablespoons milk or half and half
- 1 cup confectioners sugar
- 1 tablespoon corn syrup
- 1 teaspoon lemon extract
- 1 teaspoon yellow gel food coloring
cookie steps
In a small bowl, mix together flour, cornmeal, and salt. Set aside.
Beat butter and sugar together in a stand mixer with a paddle attachment or using a hand mixer until creamy. Add in egg and vanilla and mix.
Slowly pour in dry ingredients until dough has formed. Everything should be evenly combined.
Form dough into a ball and wrap in plastic wrap then refrigerate for 1-2 hours until firm. Refrigerating the dough will make it easier to roll out.
Preheat the oven to 375°F and line a baking sheet with parchment paper.
Cut dough into quarters and roll out one of the quarters, you will need extra flour. Use a cookie cutter to cut out cookies and place on a parchment-lined cookie sheet.
Bake for 7-9 minutes until the edges start to crisp and turn golden.
glaze steps
Place all ingredients in a medium-sized bowl and whisk to combine. Dip cooled cookies in glaze and allow to set for about 3 minutes before covering in sprinkles. I like to place the cookies on a cooling rack over a cookie sheet because it allows for easy clean-up! Let harden completely.
classic sugar cookies
The beauty of sugar cookies is that you can tailor them to any flavor you like. Here, I prepared some with a strawberry glaze and others with an almond glaze. A few drops of extract go a really long way.
When it comes to decorating cookies, royal icing and classic glaze are both foolproof techniques. Royal icing creates a smooth, matte appearance whereas the glaze presents a glossy shine when it dries. Both are fabulous options for decorating your cookies, it is more a matter of aesthetic preference!
ingredients
for the dough
- 2 ½ cups flour
- ½ teaspoon salt
- 1 teaspoon baking powder
- 1 cup (2 sticks) butter, softened
- ¾ cup granulated sugar
- 1 teaspoon vanilla extract
- 1 egg
for the strawberry glaze and decoration
- 2-3 tablespoons milk or half and half
- 1 cup confectioners sugar
- 1 tablespoon corn syrup
- 1 teaspoon strawberry extract
- Red and purple food coloring
for the almond glaze and decoration
- 2-3 tablespoons milk or half and half
- 1 cup confectioners sugar
- 1 tablespoon corn syrup
- 1 teaspoon almond extract
- Blue food coloring
cookie steps
Mix together the flour, salt, and baking powder and set aside.
Beat butter and sugar together in a stand mixer with a paddle attachment or using a hand mixer until creamy. Add in the egg and vanilla and mix.
Slowly pour in dry ingredients until dough has formed. Everything should be evenly combined.
Form dough into a ball and wrap in plastic wrap then refrigerate for 1-2 hours until firm. Refrigerating the dough will make it easier to roll out.
Preheat the oven to 375°F and line a baking sheet with parchment paper.
Cut dough into quarters and roll out one of the quarters, you will need extra flour. Use a cookie cutter to cut out cookies and place on a parchment-lined cookie sheet.
Bake for 7-9 minutes until the edges start to crisp and turn golden.
glaze steps
Place all ingredients in a medium-sized bowl and whisk to combine. Dip cooled cookies in glaze and allow to set for about 3 minutes before covering in sprinkles. I like to place the cookies on a cooling rack over a cookie sheet because it allows for easy clean-up! Let harden completely.

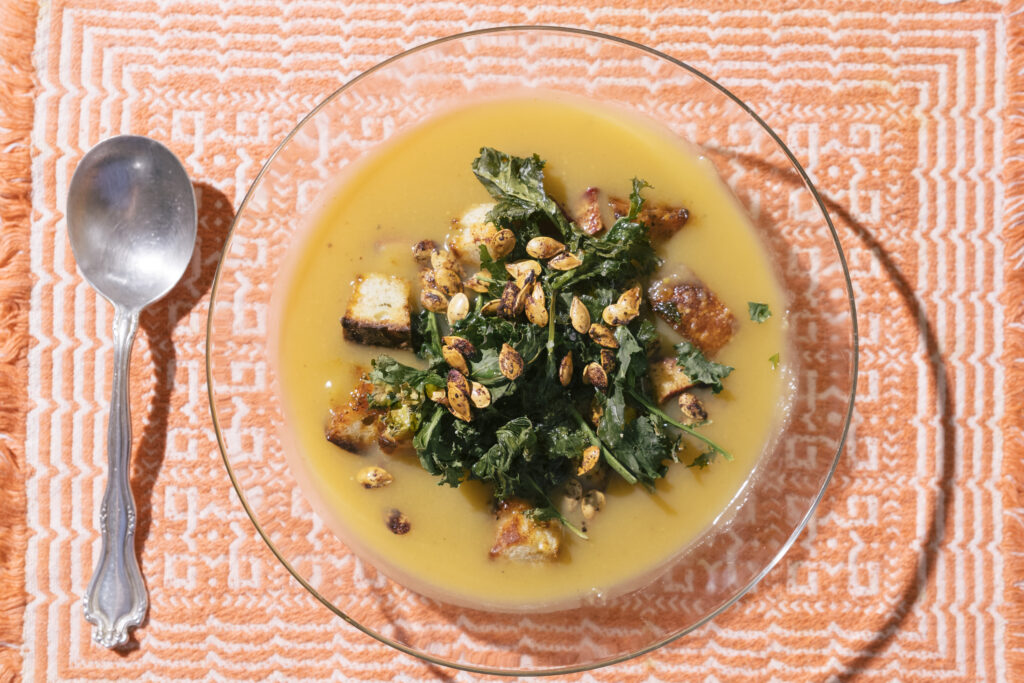
squash, apple, and kale soup with garlicky croutons
When summer comes screeching to a halt and fall rolls around, the world in which we live can sometimes seem like another world entirely. I am certainly not complaining as the changing of the seasons is one of the qualities I love most about the East Coast. As the days become shorter and the nights become longer, I find myself seeking comfort in all aspects of my day – I enjoy a piping hot coffee in the mornings and my thirst for an ice-cold afternoon smoothie or crisp sparkling water transforms into a cozy mug of tea. This is also true for meals – I begin to crave heartwarming soups over summery salads, and squash apple and kale soup with garlicky croutons is like a soup + salad + toasty bread all in one meal. A true star when it comes to cozy fall meals.
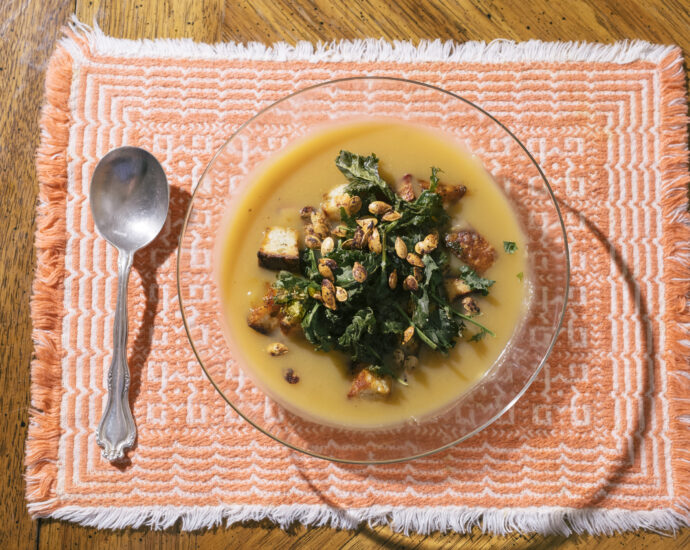
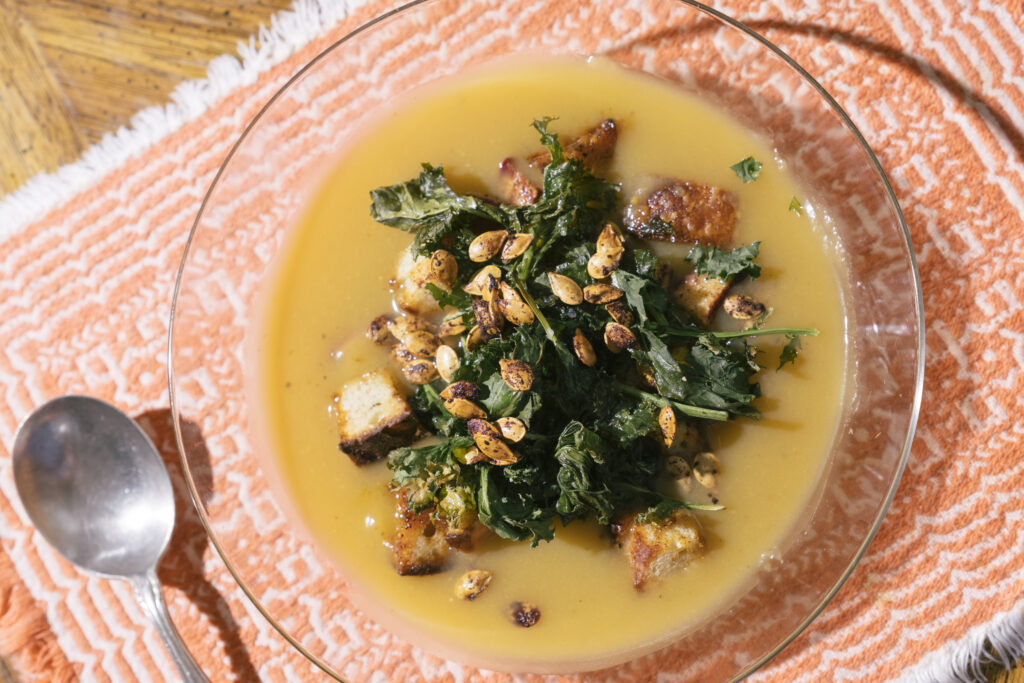
Squash apple and kale soup with garlicky croutons is layered with hearty acorn squash, sweet roasted apples, earthy roasted kale and crunchy sourdough croutons, all topped with crispy roasted squash seeds. Most of the elements for this soup are roasted in the oven then folded into a delicious savory autumnal dish.
serves 4
ingredients
for the soup
- 1 large squash (I used acorn, but butternut or pumpkin would work just as well!), halved, with the seeds reserved
- 5 tablespoons olive oil, divided
- 3 teaspoons kosher salt, divided
- 1 ½ teaspoons freshly cracked black pepper, divided
- 2 large apples (I used crimson crisp, but any sturdy kind will work), diced
- 1 ½ teaspoons cinnamon
- ¾ teaspoon cardamom
- ¾ teaspoon freshly grated nutmeg
- 3 cups kale leaves
- 3 cups vegetable stock
for the croutons
- 2 cups sourdough bread, cubed
- 1 teaspoon garlic powder
- ½ teaspoon smoked paprika
soup steps
Preheat the oven to 425°F. Place the squash, cut sides up, on a baking sheet and drizzle with 1 tablespoon olive oil, 1 teaspoon kosher salt, and ½ teaspoon freshly cracked black pepper. Roast until soft, about 45 minutes. Remove from the oven and let cool until you can peel off the skin. Chop the peeled squash into
Lower the oven temperature to 350°F. On a baking sheet, arrange the kale and drizzle with 1 tablespoon olive oil, 1 teaspoon salt, and ½ teaspoon freshly cracked black pepper. Bake until crispy, about 15 minutes, tossing halfway through. Transfer to a plate and let cool.
Spread the apples on half of another baking sheet and spread the reserved squash seeds on the other half of the baking sheet. Drizzle with 1 tablespoon of the olive oil and sprinkle with the cinnamon, cardamom, and nutmeg. Bake for 30 minutes until the apples are soft and the seeds are golden, tossing routinely.
Transfer the cooled squash and 2 cups vegetable stock to a blender. Blend until smooth and pour into a large pot to heat.
crouton steps
Reusing the baking sheet from the kale, evenly spread out the bread cubes. Drizzle with the remaining 2 teaspoons olive oil, 1 teaspoon salt, ½ teaspoon freshly cracked black pepper, the garlic powder and the smoked paprika. Bake until crisp and golden, around 15 minutes.
assembly steps
Spoon ¼ of the soup into a large bowl, and spoon ¼ of the apples, ¼ of the kale, ½ cup of the croutons, and ¼ of the seeds on top. Finish with a dusting of freshly cracked black pepper.
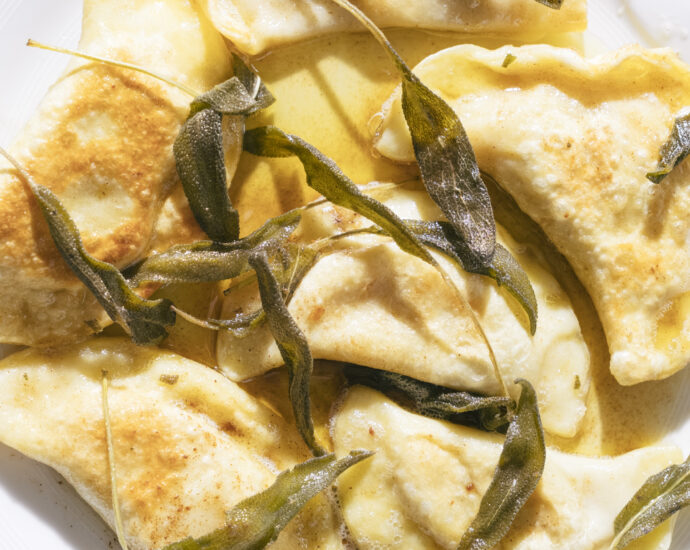
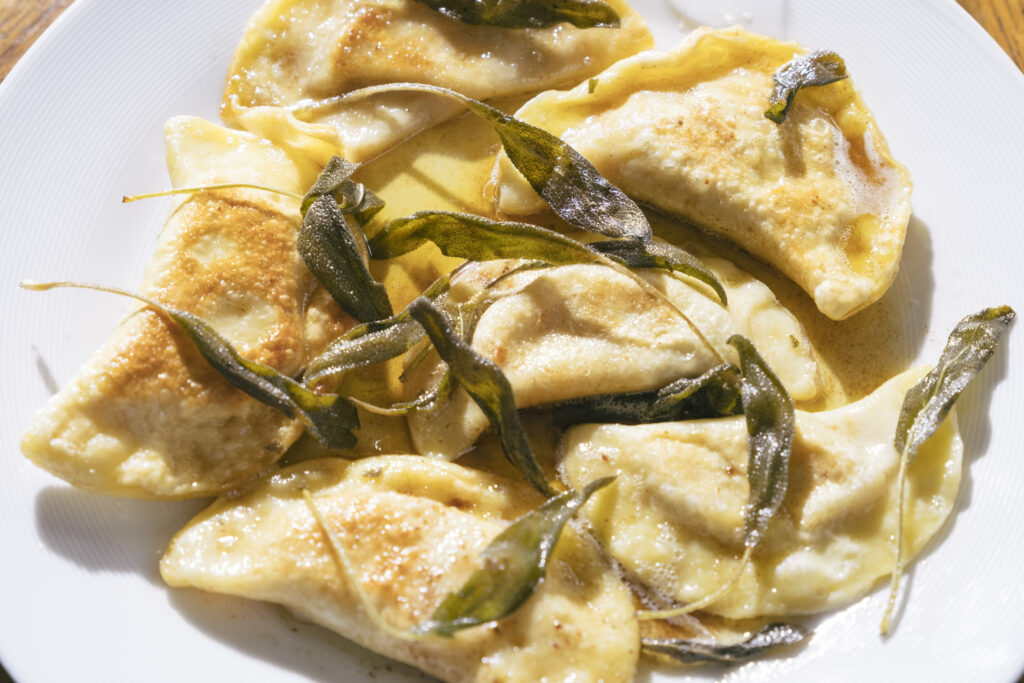
sweet potato pierogies
Happy Autumnal Equinox 2021! The leaves have begun to change and fall and the crunch heard when walking on the ground is the ultimate sign that fall has arrived. Celebrate the arrival of autumn by cooking up a batch of sweet potato pierogies!
Cooking these sweet potato pierogies in a brown butter sage sauce enhances the flavor of the sweet potato and the combined aroma evokes the optimum fall ambience. Sweet potato, butternut squash, or acorn squash and sage is the ultimate fall flavor pairing. When cooked in the butter sauce, the sage leaves crisp up in a way that is reminiscent of the crisp leaves falling from the trees. How much more autumnal can you get?
I love to whip up sweet potato pierogies with brown butter sage sauce when I am feeling festive and in the mood for fall. Once boiled, the sweet potato pierogies can be placed in plastic sandwich bags and frozen for up to 6 months!
serves 4
ingredients
for the dough
- 1 cups flour
- 1 egg
- ¼ teaspoon salt
- 3 tablespoons water
- Extra flour for rolling out dough
for the filling
- 1 medium sweet potato
- ½ teaspoon salt
- ½ teaspoon freshly cracked black pepper
for the sauce + assembly
- 1 stick butter
- 12 sage leaves
filling steps
Preheat the oven to 350°F. Prick the sweet potatoes on all sides with a fork to allow steam to escape while they bake. Place the potatoes in the oven and bake until soft, about 25-30 minutes. Remove from the oven and allow to cool, then scrape the orange insides away from the skin. Discard the skins and add the salt and pepper to the sweet potato, then mash and mix with a fork.
dough steps
Place the flour, eggs, and salt in the bowl of a stand mixer with the dough hook or a large bowl if you prefer to knead by hand. Add 5 tablespoons of water and knead the dough until blisters appear. The dough should be soft and not too sticky.
Divide the dough into two parts, working with one at a time. Roll dough out as thinly as you can, but not enough to see through or break, about ⅛ inch. Use a round shape (I used the top of a mason jar lid) to cut out circles.
Spoon about a tablespoon of filling into the center of the circle, dip your finger in a bowl of water and run it along one side of the circle. Fold one side over the other side and pinch it closed. Wetting the edges helps the dough meld together.
Place the pinched pierogies on a baking sheet dusted with flour and let sit for 5-10 minutes to dry out a bit before cooking.
Bring a pot of salted water to a boil. Boil each pierogi for 2-4 minutes, the pierogies will float to the top when they are finished cooking.
sauce steps
Heat the butter over medium-low heat. As it slowly melts, place the sage leaves flat along the melted butter and swirl the pan around to coat the leaves. Let the butter become infused by the sage leaves by allowing it to cook for 7 minutes, swirling the pan every so often to ensure even distribution of heat on the leaves.
Raise the heat to medium and cook for another 4 minutes. Then raise the heat to medium-high and place as many pierogies as you can in the pan, while making sure not to overcrowd it. Cook each pierogi for 3-4 minutes on the first side, then flip and cook for another 3-4 minutes on the other side. Place the cooked pierogies on a large plate or platter and repeat until all the pierogies have been cooked.
Once the pierogies are finished cooking, pour the remaining butter sauce over the top of the platter, making sure to evenly distribute butter and sage over each of the pierogies, then enjoy!
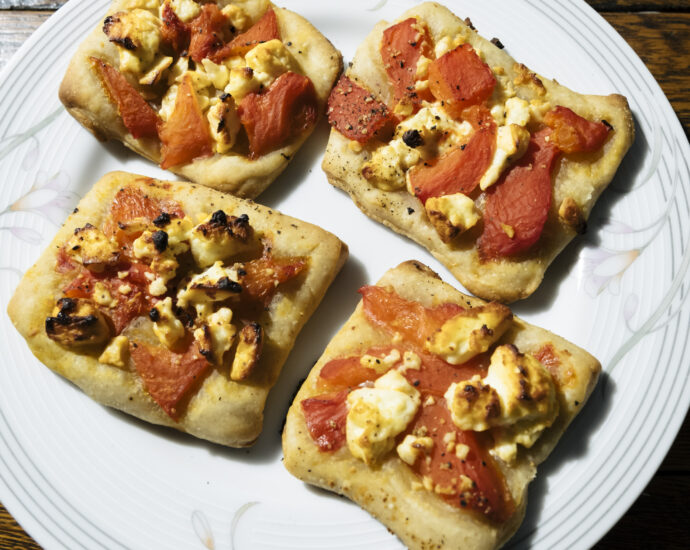
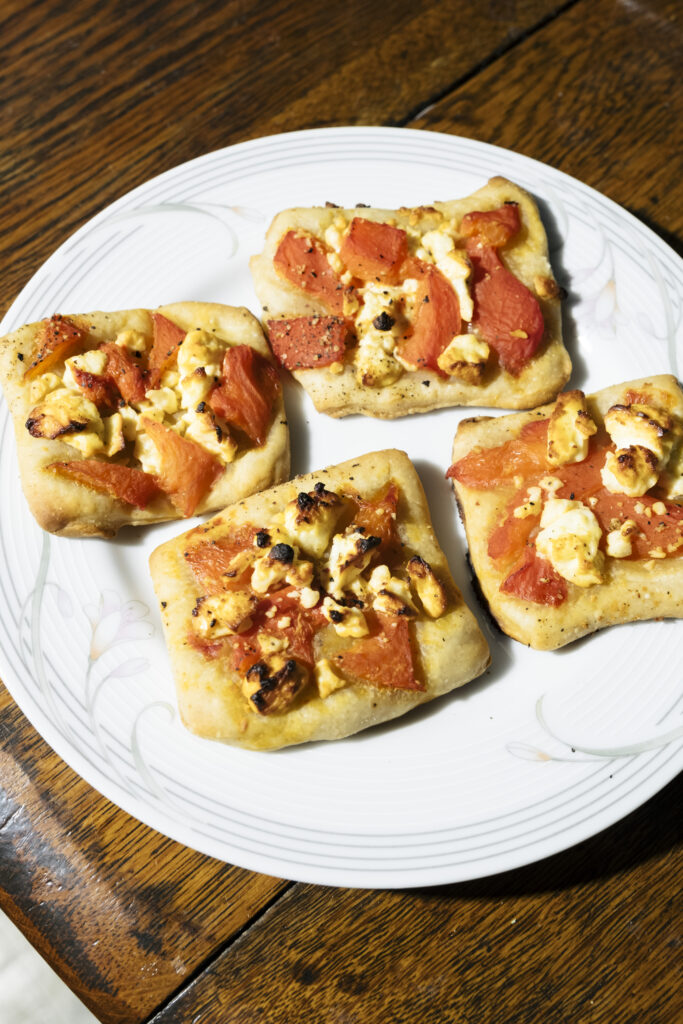
sourdough bites with roasted red pepper and feta
Sourdough bites with roasted red pepper and feta are sweet and savory and salty and cozy. The flavors are a simple + heartwarming combination that can be enjoyed as a snack or elevated into a meal. The dough’s multi-dimensional flavor develops over an extended bulk fermentation which allows the sourdough depth to slowly develop is really when and where the magic happens.
Make these sourdough bites for a crowd when entertaining or freeze them between sheets of parchment paper and bake one off at a time for a quick and delicious, real-food snack. The dough takes a full 14 hours to ferment, so make the dough the day before you intend to bake the bites.
makes about 24 bites
ingredients
for the dough
- 50g butter
- 150g water
- 100g sourdough starter 100% hydration
- 50g sugar
- 350g all-purpose flour
- 18g salt
for the toppings and assembly
- ½ cup / 100g feta, crumbled
- 4 ounces roasted red pepper, chopped
- 1 tablespoon / 18 grams freshly cracked black pepper
- 2 teaspoons / 11 grams salt
dough steps
The day before you want to bake the bites, mix together the butter and water then add the starter into a large bowl and mix until combined. Add in the sugar and mix, then add in the flour and salt and mix until the dough is evenly combined. It will be shaggy at first but become blended and somewhat sticky as you mix. With wet hands, pinch and press the dough until it is smooth then cover with plastic wrap and let it sit for 2 hours.
After the dough has rested for 2 hours, stretch the top of it up and fold it over itself. Turn the bowl 90° to the right and pull the top of the dough up and over. Repeat this 8 times total. Let the dough sit for another hour then repeat the folding process 8 more times. Let the dough sit for one more hour then repeat the series of folds one last time, for a total of three stretch and fold sequences.
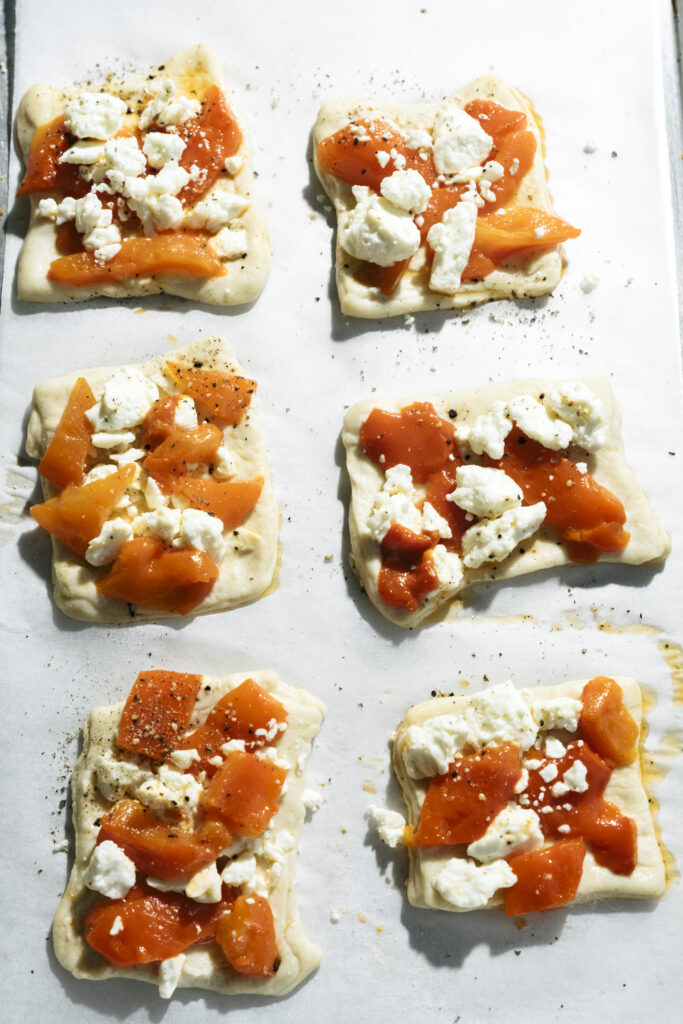
Let the dough rest for about 14 hours overnight until it has doubled in size. After this bulk fermentation, turn the dough out onto a floured surface and cut it into squares. I used a 2 ¾ x 2 ¾-inch square cutter, but you can just as easily use a knife or bench scraper.
Let the squares rest for 1-2 hours until they puff up. After this final rest, preheat the oven to 375°F.
assembly steps
Distribute about 1 teaspoon of feta on each square then layer with about 1 tablespoon of roasted red pepper. Top each square with cracked black pepper and a pinch of salt.
Bake for 20 minutes at 375°F, then turn the oven up to 450°F and bake for 10 more minutes.

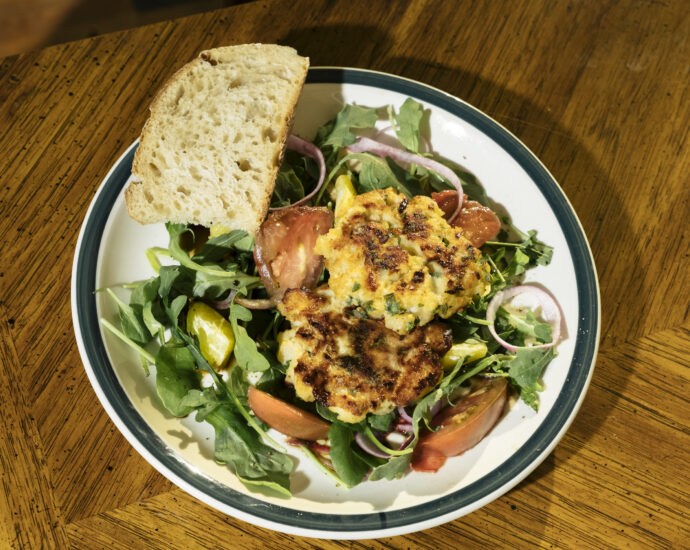
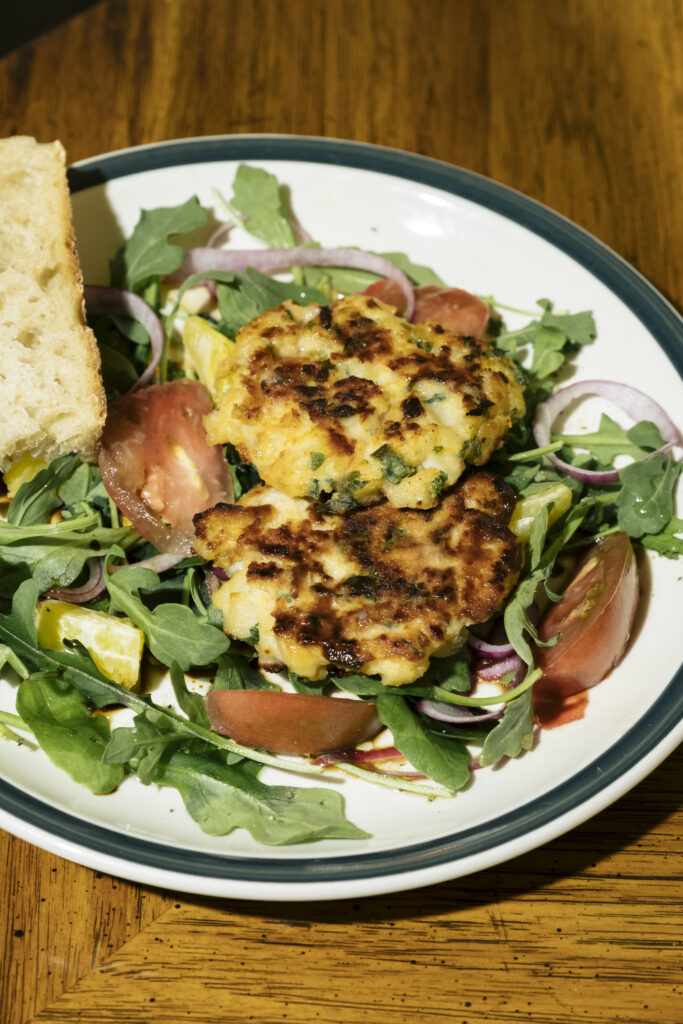
scallop cakes
As a child, I never appreciated that my parents would often serve us scallops for dinner. I remember the distinct taste that I couldn’t quite put my finger on but knew was unique and unfamiliar. I certainly loved all other seafood and shellfish, including crab cakes which were one of my favorites, but scallops remained an uncertain food in my diet. Years later, I now obviously love scallops and will eat them whenever the opportunity arises. I typically like to sauté scallops in lemon and butter, but these scallop cakes are a delicious way to mix up a regular scallop routine.
Fresh herbs and lemon zest merge with smoked paprika for a light spice which amplifies the scallops’ unique flavor in these scallop cakes. The rice flour binds the mixture and makes the scallop cakes gluten-free. Turn these scallop cakes into a sandwich with some homemade aioli or set them over a bed of salad for a light meal. The key with the preparation is to cook the scallop cakes enough on the first side before flipping them over to finish off cooking the other side for a golden exterior.
serves 4
ingredients
for the scallop cakes
- 1 pound scallops, tails removed, chopped
- 1 garlic clove, grated
- 1 teaspoon lemon zest
- 1 teaspoons salt
- 1 teaspoon freshly cracked black pepper
- ¼ teaspoon smoked paprika
- 2 tablespoons scallions, sliced
- 1 tablespoon chives, sliced
- 2 tablespoons parsley, chopped
- 1 teaspoon cilantro, chopped
- ¼ cup rice flour
- 1 egg, beaten
- 2 tablespoons olive oil
Combine the scallops, garlic, lemon zest, salt, pepper, smoked paprika, scallions, chives, parsley, and cilantro in a large bowl and mix thoroughly. Sprinkle the rice flour over the top and mix to combine. Add in the egg and mix.
Heat 1 tablespoon of the olive oil over medium heat. Spoon ⅓ to ½ cup scoops of the scallop batter into the pan. Cook for 12-14 minutes on one side then flip and cook for another 10-12 minutes on the other side.
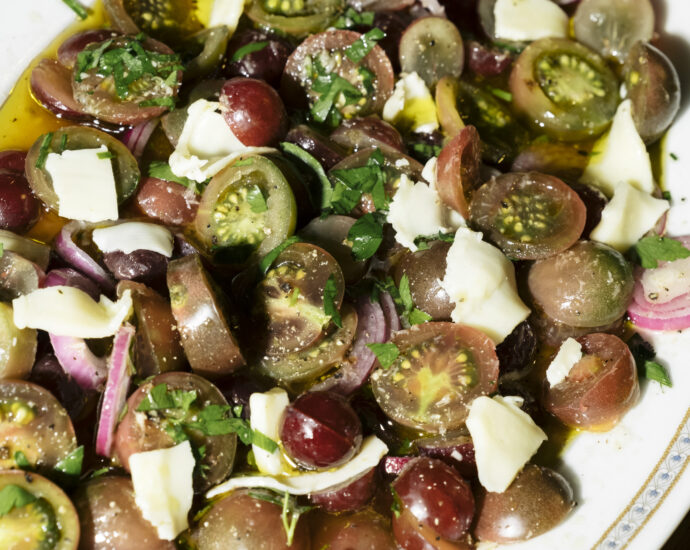
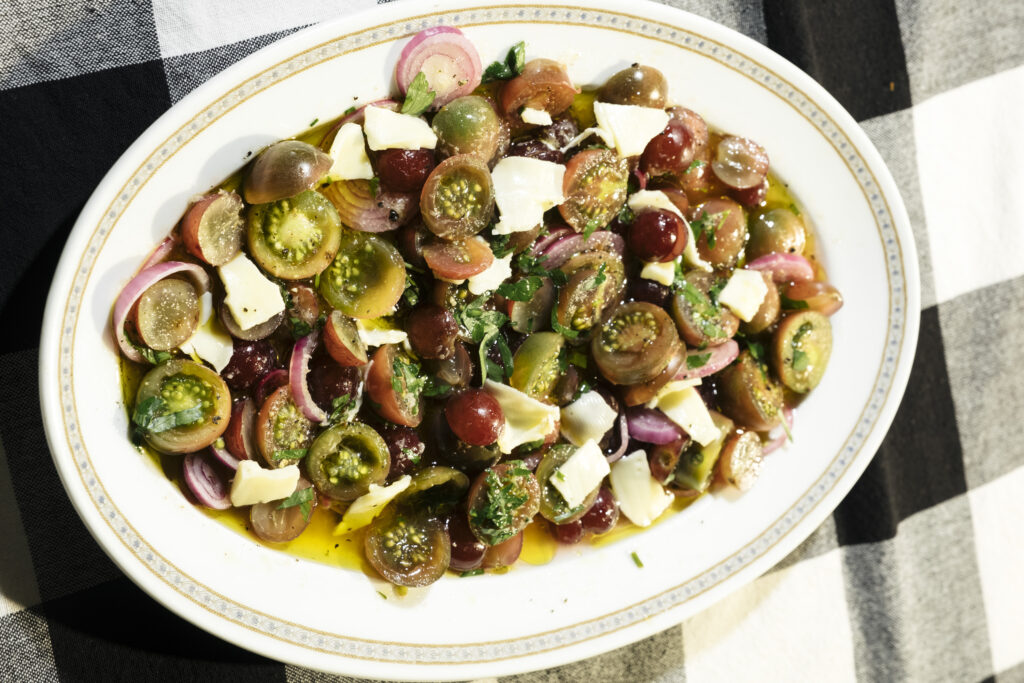
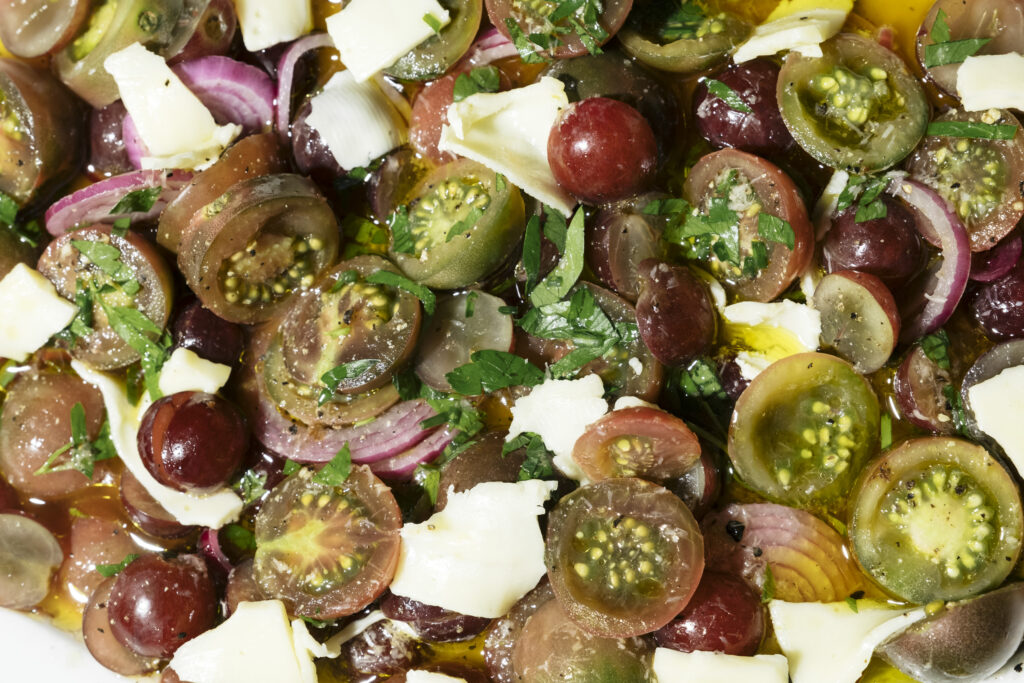
horseradish chocolate tomato and grape salad
Chocolate tomatoes are a type of small heirloom tomato whose skin turns a purpley-brown color (hence, chocolate) that we grow in our garden. You can find them at local farm stands or farmers markets. They may be small, but they are full of deep flavor. Horseradish chocolate tomato and grape salad is tart and spicy and slightly sweet from the tomatoes.
Shaved horseradish cheddar and a horseradish vinaigrette make this salad savory and salty. The flavors are similar to that of a bloody mary which, I don’t know about you, but is one of my favorite cocktails. This tomato and grape salad includes remnants of summer with a hearty spice and comfort of winter. The purple hues are even similar to that of a fall mum, perfect for this time of year.
serves 3-4
ingredients
for the vinaigrette
- 2 teaspoons prepared horseradish (I used hot)
- ¼ cup red wine vinegar
- ¼ teaspoon salt
- ½ teaspoon freshly cracked black pepper
- ¼ cup extra virgin olive oil
for the salad
- 1 cup chocolate or grape tomatoes, some halved, some sliced
- ½ cup red grapes, halved
- 1 small red onion, sliced into rings
for the assembly
- 4 ounces horseradish cheddar cheese, thinly shaved or sliced
- 1/4 cup fresh basil, loosely packed, chopped
- 1/4 cup fresh parsley, loosely packed, chopped
steps
Prepare the vinaigrette and let it sit while you arrange the salad by whisking together the horseradish, red wine vinegar, salt, and pepper in a bowl. Slowly drizzle in the olive oil as you continue to whisk to allow the dressing to properly emulsify. Set it aside and arrange the tomatoes, grapes, and red onion on a large plate or dish. Scatter the horseradish cheddar cheese, basil, and parsley over the top of the salad then pour the vinaigrette over the top of the salad. Let the salad sit for 30 minutes to 1 hour before serving. This salad is best when enjoyed day-of.

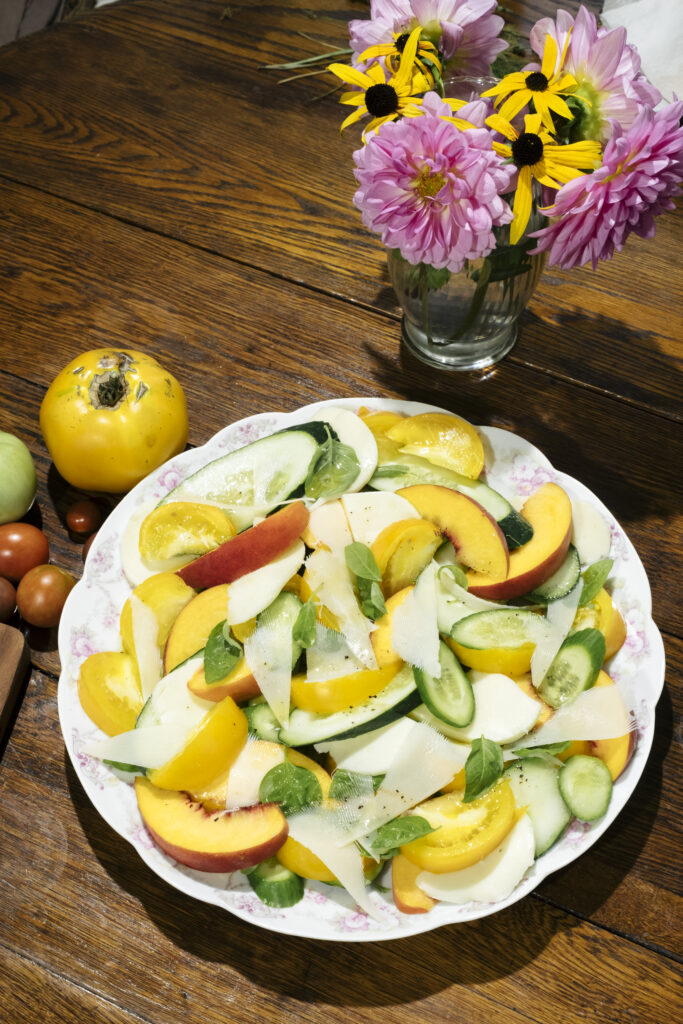
cucumber peach and yellow tomato salad
Reminder: Labor day may have come and gone, but it is still summer until the Autumnal Equinox on September 22! Thus, tomato season continues on. Once tomato season arrives, tomatoes seem to appear in nearly every meal or snack I eat. Cucumber peach and yellow tomato salad is a bright, colorful summer salad, so light and fresh you could eat it all day long. It’s kind of like a riff on a classic caprese salad with some extra sweetness and crunch.
Two varieties of cucumbers bring the crunch and the juicy yellow tomatoes and summer peaches bring the light sweetness. A touch of fish sauce enhances the unique umami of the tomatoes and adds a salty touch. Polished off with bits of shaved Parmesan and mozzarella, this cucumber peach and yellow tomato salad is a medley of some of my favorite summer produce.
ingredients
- 1 ½ tablespoons fish sauce
- 3 tablespoons olive oil
- 1 large cucumber, sliced diagonally into 1-inch pieces
- 2 Persian cucumbers
- 2 medium-large yellow tomatoes, halved and sliced ½-inch thick
- 1 large peach, halved and sliced
- ½ cup basil leaves, loosely packed
- 2 ounces Parmesan cheese, shaved
- 2 ounces mozzarella cheese, thinly sliced
- 1 teaspoon flaky salt, like maldon
steps
In a medium-sized bowl, whisk together the fish sauce and olive oil. Set aside.
Choose a large plate or platter and scatter the cucumbers, tomatoes, peach, basil, and mozzarella in layers. Drizzle the fish sauce and olive oil mixture on top. Sprinkle shaved parmesan and flaky salt on top. Allow to sit for 1 hour before serving so that the flavors marinate.
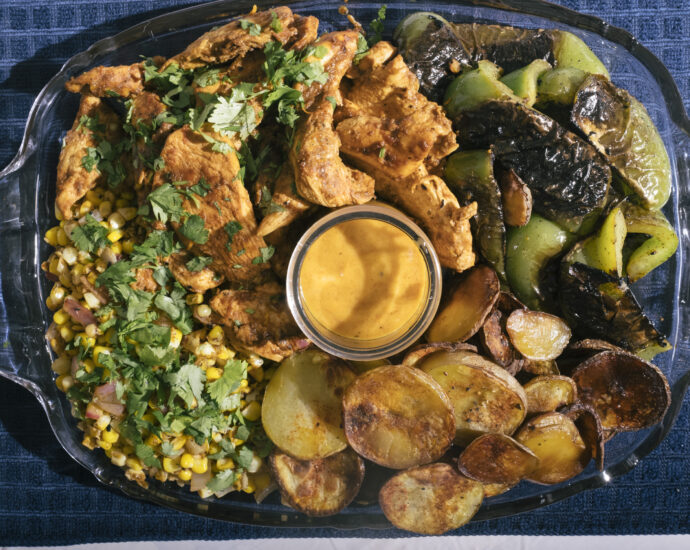
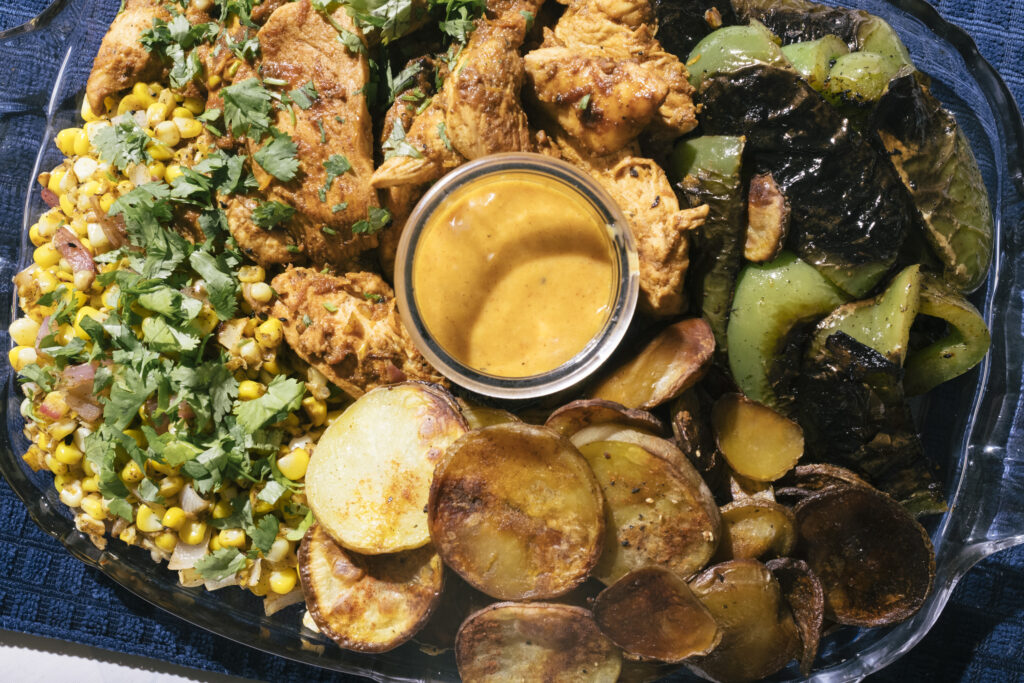
spicy orange chicken, blistered corn and green peppers, and flat fries with spicy orange aioli
Orange and a blend of spicy red pepper is one of my favorite flavor combinations to prepare chicken with. The sweetness and acid of the orange balances the heat and punch of the red pepper, creating a a marinade that is kind of like a spicy margarita, with equal parts sweetness, spice, and salt. This dish of spicy orange chicken, blistered corn and green peppers, and flat fries with spicy orange aioli incorporates that flavor combo into a meal complete with a bounty of summer vegetables. This is a very forgiving recipe, as it can be made in a variety of vessels, grilled, roasted or seared in a pan, but the flavors are the consistent stars.
The key is to marinate the chicken for a few hours before cooking, as the acid really gets the juices flowing and tenderizes the meat. It almost jump-starts the cooking process. The aioli can be made in advance, while the chicken, vegetables, and flat fries are best when served hot. I used green bell peppers here, which I believe are highly underrated, but any pepper would benefit from this flavor and blistering process. This spicy orange chicken marinade infuses the chicken with heat and flavor which when cooked, retains its juicy seasoning.
serves 4
ingredients
for the spicy orange chicken
- 1 cup freshly squeezed orange juice
- ¼ cup orange zest
- 2 garlic cloves, minced
- 1 tablespoon maple syrup
- 1 tablespoon chili powder
- 1 tablespoon smoked paprika
- 2 teaspoons cayenne pepper
- 2 pounds boneless skinless chicken breasts, sliced horizontally into thick strips
- 1 tablespoon olive oil
for the spicy orange aioli
- 1 egg yolk
- 2 garlic cloves, minced
- 1 tablespoon lemon juice
- 2 teaspoons mustard
- ½ cup neutral oil
- 1 teaspoon chili powder
- 1 teaspoon smoked paprika
- ½ teaspoon cayenne pepper
- ¼ teaspoon freshly cracked black pepper
- 1 teaspoon orange zest
for the flat fries
- 2 pounds yukon gold potatoes, sliced into ¼ inch rounds
- 2 gallons of water
- ¼ cup baking soda
- ¼ cup olive oil
- 2 teaspoons salt
- 1 teaspoon freshly cracked black pepper
for the corn and green peppers
- 2 tablespoons neutral oil
- ½ red onion, diced
- 4 ears of corn, husked and with the corn sliced off
- 2 green bell peppers, cut into 2-inch chunks
- ¼ cup freshly squeezed lime juice, divided
- 1 teaspoon salt, divided
- ½ teaspoon freshly cracked black pepper, divided
- ¼ teaspoon crushed red pepper flakes
for assembly
- 1 bunch cilantro, chopped
- Juice of 1 lime
chicken steps
2-4 hours before you are ready to begin cooking, whisk together the orange juice, orange zest, garlic, maple syrup, chili powder, smoked paprika, and cayenne. Place the chicken in a large dish or bowl and cover with the marinade. Let sit for 2-4 hours until you are ready to cook.
Once the chicken has marinated, heat a large skillet over medium high heat and add the olive oil. Place the chicken in a flat even layer on the pan and cook for 10-12 minutes on the first side, then flip and cook for another 10-12 minutes.
spicy orange aioli steps
In a large bowl, whisk together the egg yolk, garlic, lemon juice, and mustard until combined. Slowly drizzle in the oil, while continuing to whisk vigorously until the mixture comes together, this is called emulsification. Add in the chili powder, smoked paprika, cayenne, black pepper, and orange zest. Set aside.
flat fries steps
Preheat the oven to 425°F. Place the sliced potatoes in a large bowl and cover them in the water and baking soda, allowing them to soak for 30 minutes to an hour. This helps extract some of the starch, allowing the potatoes to be their crispiest when cooked. After they are finished soaking, rinse and pat them dry with a paper towel, and transfer them to a baking sheet lined with parchment paper. Drizzle them with the olive oil, salt, and freshly cracked black pepper. Bake the potatoes for about 35 minutes, shaking the tray halfway through to ensure even cooking.
corn and green peppers steps
In a large cast iron skillet, heat the oil over medium-high heat. Add the red onion and cook until it turns translucent, about 4 minutes. Add the corn, half of the lime juice, the salt, and the pepper, and cook for 7-10 minutes until it begins to slightly char. Remove from the pan and add the green peppers, skin-side down. Pour the remaining lime juice, salt, and pepper over the peppers and cook them for 7 minutes then flip them and cook for another 5 minutes until softened. The peppers will sizzle and the skin will blister.
assembly steps
Transfer the chicken, vegetables, flat fries, and aioli to a large plate or platter and dress with the lime juice and chopped cilantro.
